
• Books
    • All E-Books
    • The Natural Soapmaking Book for Beginners
    • Easy Soap Making Book
  • Food
  • Soap Recipes
  • Beauty
  • Home and Garden
    • Holidays
  • Herbs and Essential Oils
  • Homestead Hop
  • Shop
  • Blog
Simple Life MomSimple Life Mom
  • Books
    • All E-Books
    • The Natural Soapmaking Book for Beginners
    • Easy Soap Making Book
  • Food
  • Soap Recipes
  • Beauty
  • Home and Garden
    • Holidays
  • Herbs and Essential Oils
  • Homestead Hop
  • Shop
  • Blog

How to Make Beef Bone Broth

Posted by Kelly Real Food, Sauces, Dressings, Dips, and Broths 34 comments
Please Share

Learning how to make beef bone broth is very fulfilling.  I’ve made my own chicken stock for a long time; boiling the carcass with onions, carrots, and celery.  I’ve not bought a cow before to have the good bones from a grass-fed cow for bone broth, so I was excited to be given some great bones so that I could create some delicious bone broth full of good gelatin and minerals.  I mean, look at how dark that is!  It tastes amazing!
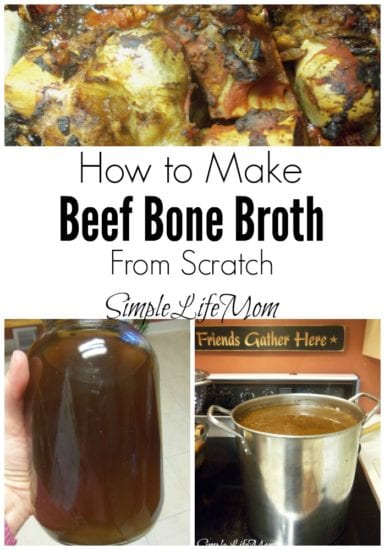
How to Make Beef Bone Broth. Learn about the amazing health benefits and how to make bone broth from scratch from Simple Life Mom

Beef Bone Broth Benefits

Inexpensive:

You can make a TON of great bone broth and keep it in your freezer for a very inexpensive broth for many different types of dishes (not just soup).  This is very helpful when you consider how expensive good quality organic bone broth can be.

Health Benefits:

According to many sources, including the Nourished Kitchen, “Homemade broth is rich in calcium, magnesium, phosphorus and other trace minerals.   The minerals in broth are easily absorbed by the body.   Bone broth even contains glucosamine and chondroitin – which are thought to help mitigate the deleterious effects of arthritis and joint pain.” (nourishedkitchen.com)

Kate, at Real Food RN has a an extensive list to the health benefits, including:

  • Heals leaky-gut related conditions and lessens inflammation in the mucosal lining
  • Helps to heal autoimmune conditions by healing the gut
  • Aids in detoxification by supporting the liver
  • Aids digestion by regulating the synthesis of bile salts and the secretion of gastric acid
  • Improves nervous system function and keeps our minds (and moods) in good working order
  • Boosts antioxidant activity in the body, thus decreasing oxidative damage
  • Balances blood sugar, helps maintain muscle, and regulates human growth hormone (for all you gym-goers out there)
  • Helps to reverse heart disease by reducing atherosclerotic plaque build-up
  • Reduced cellulite, stretch marks, and wrinkles (from the collagen content)
  • Improves hair and nails
  • Re-mineralizes teeth

So, there are many great reasons to make your own bone broth and eat it regularly.  And it’s not difficult.  It just takes a bit of time.  Here’s the recipe:

Homemade Beef Bone Broth

Ingredients:

  • 4 large carrots
  • 2 onions
  • 6 celery stalks
  • 4 cloves garlic, crushed
  • 1/4 cup tomato paste (brush over bones)
  • 2-4 gallons of filtered water (divided amongst 2 pots)
  • 1/2 cup of red wine vinegar

Instructions:

  1. Place 5lbs bones in glass dishes or roasting pans where they have enough space to brown nicely (If you have 2-3 lb of bones, just cut the recipe in half)
  2. Slice roughly and add to veggies and tomato paste
  3. Bake at 350F degrees for 30-60 minutes, or until bones are brown, turning once.
  4. Add bones and veggies to stock pot (For 5 lbs I needed two stock pots)
  5. Pour 2-4 gallons of filtered water (divided amongst 2 pots) into pots over bones and veggies.
  6. Add 1/4 cup of red wine vinegar to each pot. This will help draw the minerals from the bones.
  7. Simmer (not boil) for up to 12 hours! Yes, if you start it in the morning and keep an eye on it all day, it will be ready to strain by evening.
  8. Skim some of the fat off the top. If you use a spoon, you can tell the clear oil from the more creamy looking broth underneath.
  9. After simmering is finished, strain broth (I used a fine mesh colander inside a large colander).
  10. Jar immediately, leaving 2 inch space on top of jar and freeze when cooled.
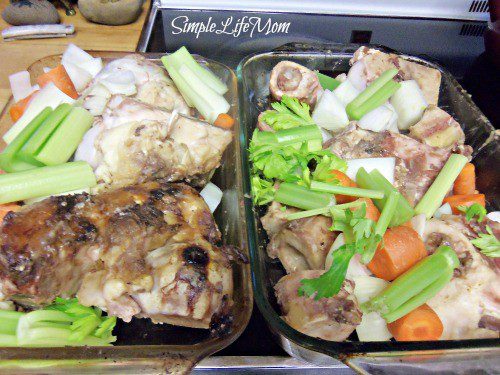
How to Make Beef Bone Broth from Simple Life Mom

3) Bake at 350F degrees for 30-60 minutes, or until bones are brown, turning once.
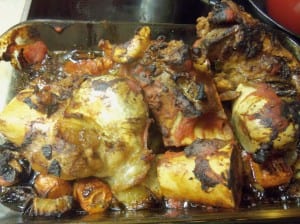
How to Make Beef Bone Broth

4) Add bones and veggies to stock pot (For 5 lbs I needed two stock pots)

5) Pour 2-4 gallons of filtered water (divided amongst 2 pots) into pots over bones and veggies.
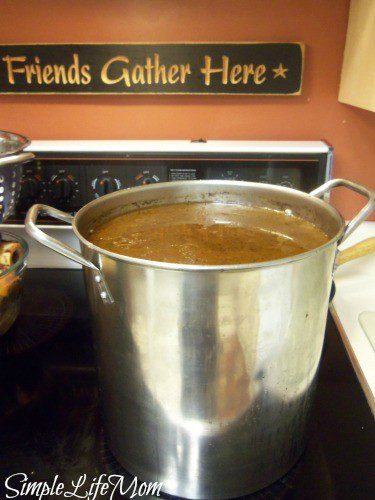
How to Make Beef Bone Broth from Simple Life Mom

6) Add 1/4 cup of red wine vinegar to each pot.  This will help draw the minerals from the bones.

7) Simmer (not boil) for up to 12 hours!  Yes, if you start it in the morning and keep an eye on it all day, it will be ready to strain by evening.

8) Skim some of the fat off the top.  If you use a spoon, you can tell the clear oil from the more creamy looking broth underneath.

9) After simmering is finished, strain broth (I used a fine mesh colander inside a large colander).

10) Jar immediately, leaving 2 inch space on top of jar and freeze when cooled (It will bust the glass if you don’t leave enough space and you’ve worked too hard to have to throw it away!)  Or, wait until cool and measure 4 cups into zip closing bags, seal, lay flat in freezer and freeze.
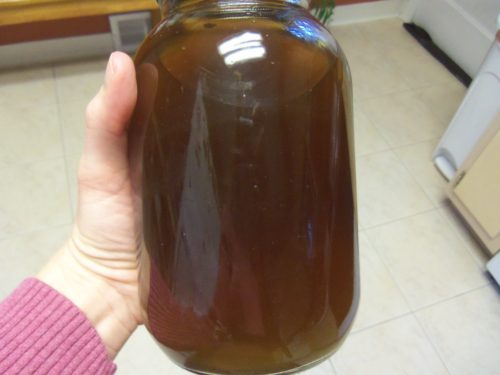
How to Make Beef Bone Broth. Learn about the amazing health benefits and how to make bone broth from scratch from Simple Life Mom

There! A little time consuming, but not difficult.  And wow does it make the best soup I’ve ever tasted!


Please Share
34 comments

About Kelly

Kelly is the author of number one best seller The Natural Soap Making Book for Beginners and Easy Soap Making. She's also written multiple ebooks on herbal remedies and natural bath and body DIYs. Her journey toward better health has inspired her to make things in and around the home from scratch, start a homestead, and become more resourceful when it comes to health and home. She shares her recipes and DIYs here on Simple Life Mom and has a shop where she sells products for those who would rather buy than make (SimpleLifeMom.com/shop).

You also might be interested in

Homestead Blog Hop - Homestead tips, ideas, animal care, and recipes every Wednesday

Homestead Blog Hop 601 -Apple Sauce, Cole Slaw, and Farmer’s Markets

May 26, 2026

Please Share Welcome to Homestead Blog Hop, a weekly gathering[...]

Homestead Blog Hop - Homestead tips, ideas, animal care, and recipes every Wednesday

Homestead Blog Hop 621 Cheeseballs and Snickerdoodles

Oct 13, 2026

Please Share Welcome to the Homestead Blog Hop. A weekly[...]

Homestead Blog Hop - Homestead tips, ideas, animal care, and recipes every Wednesday

Homestead Blog Hop 481 – Get ready for baby chicks and Valentine’s Day

Jan 23, 2024

Please Share I hope you’ve have a wonderful week. Before[...]

34 comments

Leave your reply.
  • busymama911
    · Reply

    March 26, 2014 at 9:39 PM

    Do you get your broth to gel when cool? I can’t seem to. I cook it for 48 hours. Then put in the fridge and skim the fat. It tastes great, but does not get gel like.

    • Simple Life Mom
      · Reply

      Author
      March 27, 2014 at 7:45 AM

      As you know, it’s still full of nutrients if it doesn’t gel, just less of that hreat gelatin. My last batch did, but it doesn’t always get as thick as I want. I believe it has something to do with the bones and where they come from, but I’m not sure. I’ll look into it more.

  • Fiona
    · Reply

    March 27, 2014 at 4:32 PM

    Can you pressure can this broth?

    • Simple Life Mom
      · Reply

      Author
      March 27, 2014 at 4:50 PM

      Yes. You cannot can by simply boiling because it will not reach temperatures high enough to kill the risk of botulism, but pressure canning will reach high enough temperatures. I’m not sure about the nutrient lose for the high temps., but it’s still much better than store bought!

      • Fiona
        · Reply

        March 27, 2014 at 6:30 PM

        Thank you for your answer….I have some great beef bones and I think this is the broth I want to use them for! I love the dep rich color you have made! I have just found your blog and am enjoying it very much!

        • Simple Life Mom
          · Reply

          Author
          March 27, 2014 at 7:53 PM

          I’m so glad!! Let me know if you ever can’t find what you’re looking for.

  • Carie Spence
    · Reply

    March 28, 2014 at 7:30 AM

    Love this and the benefits. Def pinning! Thanks!

  • Marla
    · Reply

    March 28, 2014 at 3:13 PM

    My doctor was just talking to me about making bone broth last week and how good it was for our bodies. So I was glad to come across your recipe. Thanks for sharing on Real Food Friday Blog Hop.

  • GC at Calm.Healthy.Sexy.
    · Reply

    March 30, 2014 at 12:02 PM

    Hi Kelly – I have to admit that I have never made broth from beef bones (although I have made chicken and turkey broth). I have wanted to, but somehow it seemed beyond my capabilities! Thanks for the recipe and instructions – I am going to give it a try. Thanks so much for sharing with the Let’s Get Real party. I’m pinning it to our group board.

  • backtothebooknutrition
    · Reply

    March 31, 2014 at 7:53 AM

    I’ve only recently begun experimenting with bone broths and have yet to make one from beef bones – thanks for the recipe! {visiting from Savoring Saturdays}

  • Carolyn
    · Reply

    April 1, 2014 at 11:27 AM

    What is the purpose of roasting the veggies and bones before simmering them? Could this perhaps be the reason the broth does not gel as well as you would like? I am looking into recipes for bone broth and love your added veggies and tomato paste (organic of course) and think the taste would be much improved with those ingredients, but this is the first I have come across roasting the ingredients first. Thanks for this recipe.

    • Simple Life Mom
      · Reply

      Author
      April 1, 2014 at 12:12 PM

      Great question. This batch really did gel nicely. The roasting is primarily for taste, but it also helps the mineral content of the bones to be released. With the gelling, it can also gel less if you water it down too much. All these will be a factor. But I do love the added flavor of roasting with the veggies. In my opinion, It is heads above all the rest. 🙂

  • Carolyn
    · Reply

    April 1, 2014 at 4:29 PM

    Thanks!

  • Karen
    · Reply

    April 2, 2014 at 10:21 AM

    I have made lots of chicken broth, but never beef broth. We are going to purchase a 1/2 side of beef this spring and I would like to know which bones to use for broth. Are there extra bones that I would be able to get this way that would be different than those I could buy at the store? I guess I’m not sure what to ask for at the time of butchering. Any information would be appreciated.

    • Simple Life Mom
      · Reply

      Author
      April 2, 2014 at 3:03 PM

      Great question. Every farmer is different. Some offer packages pre designed, while others walk you through possible cuts etc (how much you want ground, things like that). I would just ask them how it is cut and what your options are and then ask about the bones. Tell them you want them. Some will throw in the heart and other odd pieces that other people don’t want too (but are super good for you).

  • Matt
    · Reply

    April 2, 2014 at 8:45 PM

    We take the broth and freeze it in ice cube trays for single servings. My wife uses these when making rice, quinoa, etc. instead of water to add flavor and nutrients.

    • Simple Life Mom
      · Reply

      Author
      April 2, 2014 at 9:43 PM

      Wonderful idea!! Thanks.

  • Eva@Whole Food Mom on a Budget
    · Reply

    April 3, 2014 at 7:16 PM

    I’ve pinned to my recipes board for later. Thanks for the informative post! I’ve never made bone broth before.

  • Raia
    · Reply

    April 4, 2014 at 8:56 PM

    Great post, Kelly! Thanks for sharing it at Savoring Saturdays! 🙂

  • Laura@Baking In Pyjamas
    · Reply

    April 6, 2014 at 1:33 PM

    I can imagine that tastes great and makes a great base for a stew. Thanks for linking up to Sweet and Savoury Sunday, stop by and link up again this weekend!

  • Miz Helen
    · Reply

    April 26, 2014 at 4:58 PM

    What a great recipe for Beef Bone Broth, it is wonderful! Hope you are having a great weekend and thanks so much for sharing your awesome recipe with Full Plate Thursday.
    Come Back Soon!
    Miz Helen

  • Kimberly Stover
    · Reply

    April 30, 2014 at 5:49 PM

    Just a quick question. Do you cover the pot when it is simmering or leave it off?

    • Simple Life Mom
      · Reply

      Author
      April 30, 2014 at 6:04 PM

      Good question. Leave it off so it condenses down a bit.

  • canaryinthekitchen
    · Reply

    May 16, 2014 at 7:56 AM

    Great informative post thanks

  • Marla
    · Reply

    July 12, 2014 at 10:00 AM

    Great post and recipe. Thanks for adding all the wonderful health benefits and sharing on Real Food Fridays Blog Hop. Will pin and share on google.

  • Marla
    · Reply

    July 17, 2014 at 9:41 AM

    Just a note to let you know I choose your post “How to Make Bone Broth” as one of my features this week on Real Food Fridays Blog hop. Thanks for being part of Real Food Fridays and sharing. Have a healthy happy day.

    • Kelly
      · Reply

      Author
      April 13, 2016 at 7:48 PM

      Thank you Marla!!

  • Kate
    · Reply

    April 13, 2016 at 7:18 PM

    I’ve tried making bone broth (beef) once before, using a recipe that was similar to yours. I let it simmer for 48 hours, and was so disappointed to find an enormous amount (a good 3-4 inches on top of the broth) of fat, and virtually no flavor to the broth. I chilled the broth and removed almost all of the congealed (eww!) fat…and the closest thing to “flavor” I could taste was just a greasy spoonful of pale brown-ish water. I keep thinking it was lousy bones (if thats possible?) from the local grocery store (clean store, ridiculous prices because they can)…they charged $2.50/lb! That seems ridiculously high to me, but I wouldn’t mind paying it if it was any good :(. I seasoned the bones with salt & pepper before roasting them, and used carrots, celery, onion and garlic in the broth. Any ideas on what I might have done wrong? If I remember correctly, they gave me leg bones…good or bad? Its almost impossible for me to “gather” bones from things I’ve cooked…its just me and the pup :). I make chicken bone broth regularly…always have bones because I make food for my lil buddy (dark meat chicken, brown rice and green beans)..and even though I don’t use garlic or onion in the broth (bad for the pup, and I usually dump whatever broth I have left in the freezer – ice cube trays here too) in to the leg quarters when I cook them. Whew, a whole novel for one question..lol! I really want to try this again and would appreciate any suggestions you might have. Thanks so much, I LOVE your blog! 🙂

    • Kelly
      · Reply

      Author
      April 13, 2016 at 7:48 PM

      Ideas – you could cook it down a lot more. Reduce the water so the flavor is more powerful. Roast the bones with some tomato paste first. The quality of the bones does matter. Mine has a strong beef broth flavor so I’m not sure what else you could do. Hope that helps.

  • Katy SkipTheBag
    · Reply

    September 14, 2016 at 6:31 AM

    I’ve only made chicken stock before. This looks easy enough! I wouldn’t have through to add red wine vinegar, but I bet it helps with the flavor.

  • Delci @ Heritage Club Stables
    · Reply

    September 21, 2016 at 3:16 PM

    I’ve only made chicken stock! I’ve always meant to try the beef bone broth 🙂 I gotta slow down and just do it! Thanks for the reminder and sharing on the Homesteader Blog Hop!

  • Ilka
    · Reply

    September 26, 2016 at 8:22 PM

    Kelly – I’m a big fan of bone broth. Besides all the great health benefits I also use it regularly as the base for my chicken soup.

  • LaRinda
    · Reply

    January 30, 2025 at 9:08 PM

    Question: when i used a turkey carcass for broth it was Sooo good, I feel I lost a lot of turkey that fell off the bones, and if I add the carrots and onion and celery etc I feel I would be losing a lot of good food? I thought you washed the vegetables and tgen peeled using the peelings in the broth?

    • Kelly
      · Reply

      Author
      January 31, 2025 at 8:44 AM

      You can always use a sieve to get the veggies and any meat out of the broth to use, but the veggies will be very mushy. I’ve always used the whole vegetable, but you could use the peelings as long as they are organic vegetables.

Leave a Reply

We'd love to hear your thoughts and ideas!
Cancel Reply

Recipe Rating


Join the Simple Life Mom Community

And get a FREE Bath and Body Recipe E-Book:

Thank you!

Check your email and add me to your address list so messages don't go to spam. 

You'll have a link to the free e-book in the email.

Kelly

SHOP

Join Us and Get New DIYs and Recipes Subscribe

Categories

  • Soap Making
  • Bath and Beauty
  • Health and Essential Oils
  • Home and Garden
  • Homestead Blog Hop
  • Real Food Recipes

Books

  • Natural Soap Making Book for Beginners
  • Easy Soap Making
  • Natural Soap Making How-To and Recipe Book
  • Make it Yourself: Bath & Home DIY for Self Sustainability
  • Natural Beauty from Head to Toe
  • Herbs & Essential Oils in Soap Making

SHOP

Other Resources

  • Mountain Rose Herbs
  • Herbal Academy
  • Amazon
  • Revelation Health

© 2026 Simple Life Mom - All Rights Reserved

  • Disclaimers/Policies for Simple Life Mom

Press Enter to search · Esc to close