Make sure you check out Toxins in Pads and Tampons Part 1 if you missed it. I outline the reasons why we need this Homemade Pad Pattern and Organic Alternatives. Basically, because of the pesticides used on cotton, the quality of cotton used, the chemicals used to process the pads and tampon materials, glues, plus the chemical fragrances that are added, we come in contact with very harsh toxins that are placed on the most permeable skin on our bodies.
Ladies, enough is enough! This should not be, and we should show our frustration with our dollars by making our own products or purchasing from those who are aware of the issue and providing a healthy alternative.
Homemade Pad Pattern and Organic Alternatives
Ok, we’re going to get real here. I tell all men that they need to know about the toxicity issue with pads and tampons, so they can inform, support, and protect their women. But if you’d like to check out here and simply forward this on to her, I totally understand.
What are our options?
1) Menstrual Cup
What and How:
This kind of freaked me out when I first heard of it. Yes, stupid of me since tampons are a norm. But anyway, it basically consists of a tiny silicone cup that you fold together, insert, let open and collect menstrual flow. Depending on the rate of your flow, you can leave it in for hours. You then need to empty in into a toilet and rinse it clean, before reusing. It’s that simple.
Although everyone I’ve heard use one say that they love it, even they will tell you that they had to adjust or figure it out. Some say they took a couple of months to really get the hang of it, but they all say it is the best thing ever! A reader from the last article said she only felt comfortable after turning it inside out. If you do have some difficulty, consider giving it time and that you possibly need a different size.
The Frugal Aspect:
You can use one over and over again. I’m talking years, ladies. Talk about saving money!!! Even if you spend $25 on one cup, you’re saving hundreds and hundreds of dollars per year.
Types:
There are a number of them out there. They will vary in size and material. There are usually 2 sizes that are determined on how many cm it is to your cervix, but is described as whether you’ve had children or not, or are younger or older. They’re very descriptive to help you pick. The materials used are mostly silicone, though I have heard people say that they have found some made of rubber or TPE (thermoplastic elastomers). Most will also say Phlalate Free, Latex Free, Dioxin Free, and BPA free.
Most Popular Brands (with links):
2) Organic Cotton Pads and Tampons (disposable)
What and How:
Be cautious of these. They may use organic cotton and say that they did not use chlorine to bleach the cotton and did not use fragrances, but what was used to bleach them? What about the glues? I have too many questions to use these. See Toxins in Pads and Tampons for why.
The Frugal Aspect:
There is no frugal aspect. These are expensive. If you cannot stand the thought of washing anything out, then this is a much better option then doing nothing, but I will highly encourage you to try one of the other options as well.
Types:
You can sometimes find organic options in your local drug stores and super stores. If you’d like to buy online, a few options are:
Tampons
Pads
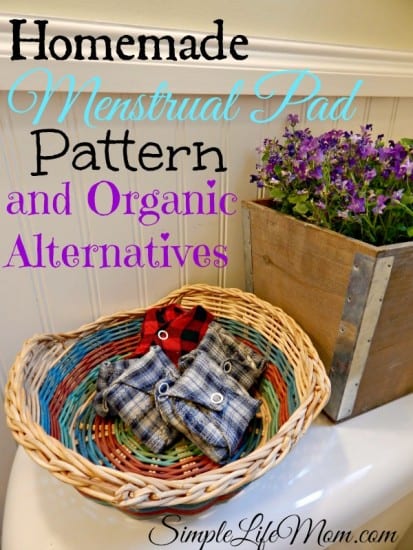
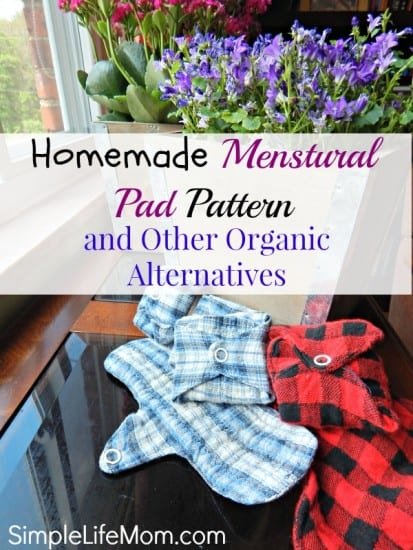
3) Cloth Pads (reusable)
What and How:
Cloth pads are reusable cotton pads that snap around your underwear. You can buy them or make them at variant thicknesses and lengths. My sister-in-law buys hers; I make mine. I love them. They are comfortable and cool.
How do you use them? You wear them like a normal pad and then wash it out after use. People do this differently. The easiest in my opinion is to rinse it well and then throw it in the dirty wash and wash it with the rest of your laundry. Another option is to get in the shower with it, step on it as you shower to rinse it out, then throw it in with your laundry – or just finish washing it out.
Don’t bleach them! That kind of defeats the entire purpose of switching.
Think you’ll have to have a ton of them? Well, everyone that I have talked to that switched from store bought to cotton reusable pads has said that their period shortened in duration and became lighter. If that doesn’t speak to the fact that regular store bought ones are toxic, I don’t know what does. Mine went from horrible 9-10 days in length to 3-4! No kidding!!! My sister-in-law had the same experience. Since then, I’ve read and heard about other women saying the same thing (makes the effort of washing it out well worth it).
The Frugal Aspect:
This option is highly frugal. I have used the same pads for about two years and am just now deciding I may want to make some new ones for myself. And that’s only because they look old and dingy, not because they are not functional any more.
So if you decide to purchase some, here’s a few options:
Homemade Menstrual Pad Pattern
First let me tell you that I am no seamstress. I can sew curtains with a crooked stitch, napkins, and other square objects, so believe me when I say that you can do this!
Outer Layer Material: cotton, flannel, or other material that you are happy with (organic cotton preferred)
Inner Layer Material: Toweling is the best. I used an old bathroom hand towel.
Layering: You can cut out as many inner layers as you think you need. I have made five with 1 layer and three with 4 layers that I use at night or heavy days. These eight pads are enough for my use each month, as I will wash them all sometime during that time.
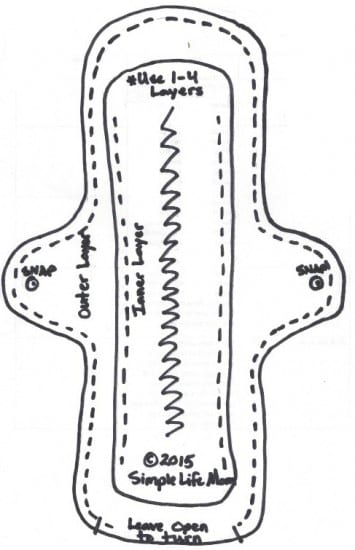
FREE PATTERN TO DOWNLOAD:
Homemade Menstrual Pad Pattern and Organic Alternatives from Simple Life Mom – Free Printable
 Instructions:
- Print out two copies.
- Cut one copy around the outer edge for the outer layer.
- Cut the second copy around the inner edge for the inner layers.
- Cut out 2 outer layers for each pad and however many inner layers that you desire.
- Place inner layers on inner side of one outer layer and sew in a zigzag pattern to attach.
- Place second outer layer underneath the first outer layer (with inner layers on top) and sew around edges only, leaving a space at the bottom so you can turn the whole thing inside out.
- Once you turn the pad, tuck in the bottom edge and sew shut.
- Sew down the edges of the inner layers. This prevents it from curling up inside when you wash it.
I’ve included a shorter pad and a longer pad pattern. Some women I’ve talked to and shown my pads to have asked for the longer pattern. I prefer the shorter, so choose what you think would work best for you.
Q & A:
1) How often do I need to change it?
This obviously depends on how heavy you are bleeding. Don’t get all nervous and layer 6 pads on at once. Instead, try one out when you can get to a bathroom often and see how it goes.
2) Do they leak?
Well, if they get really saturated they will, but you’d be surprised how long that actually takes. Here’s the brutal honesty. When you use cloth pads you will be more aware of your body. If you feel that you are bleeding more, go to the bathroom. This keeps your pad cleaner longer.
3) What changes in your body have you noticed?
The greatest thing is that I went from a 9-10 day period to 3-4 days – Literally! And I’m not the only one I’ve heard say this. A friend of mine went from 8 days to 5. That’s a wonderful difference!! It’s a testimony to the impact that toxic pads and tampons have on our bodies.





13 Comments
Leave your reply.