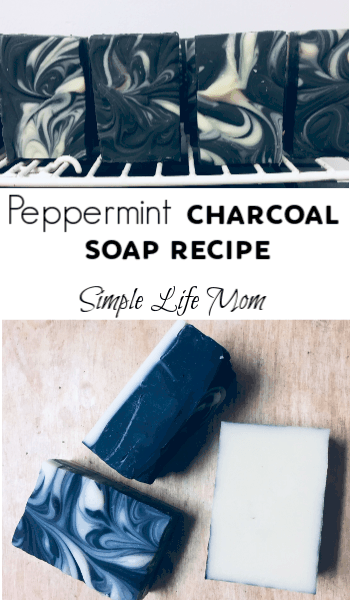
I had a lot of fun making this soap. I’ve been wanting to make a charcoal soap recipe with a peppermint scent and white specks or swirls for a while now. I like the white on black or black with white highlights look. It just seems that peppermint fits. Of course, you can add whatever scent you prefer.
It make a great present: a pretty Valentine’s Day gift for your mom, daughter, or friend, Mother’s Day gift, Wedding or Baby Shower favors when cut into cute 2oz bars. You have so many fun options with this beautiful charcoal bar.
Health Benefits
When I make a soap recipe, I make it first and foremost healthy. What’s the point in making something to go on your skin if it has bad ingredients in it? There are too many healthy options to think you need to choose anything toxic.
What I love about activated charcoal is that it helps make a soap that is amazing for your skin. I’ve had testimony after testimony about how my tea tree charcoal soap has gotten rid of acne, eczema, and other skin related issues. The tea tree helps kill bacteria, but it’s the charcoal that gives the skin a deep cleanse.
Peppermint is bright and uplifting. It is very cooling in the summertime. Another reason I thought the light and dark with a bright scent would go well together.
Layers and Swirls
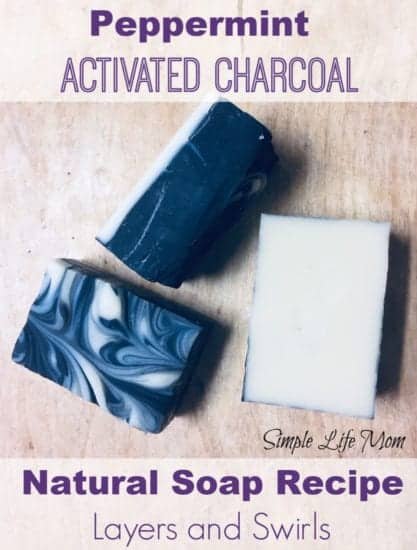
It adds an extra bit of beauty to add a thin line of color on the bottom. This is easy to do by just pouring a little bit of the batch into the bottom of your mold before you add the charcoal. You can choose how thick or thin you’d like to make that layer.
Remember, with layers you need your batter to be at thick trace so that one color doesn’t sink into the other. But you usually want moderately thin trace to make pretty swirls. So how does that work? Well, the lovely thing about this recipe is that it shows how forgiving soap making can be. I have pictures to demonstrate.
Separating Colors
To make this charcoal soap recipe, you’ll need to weigh and melt the oils and weigh and mix your lye water, just as you would any cold process soap recipe. Add lye water to oils when temperatures are around 100 degrees. Blend until medium light trace and blend in essential oils. Pour a small layer on the bottom of your prepared mold.
ALSO, remove some white soap for the swirls.
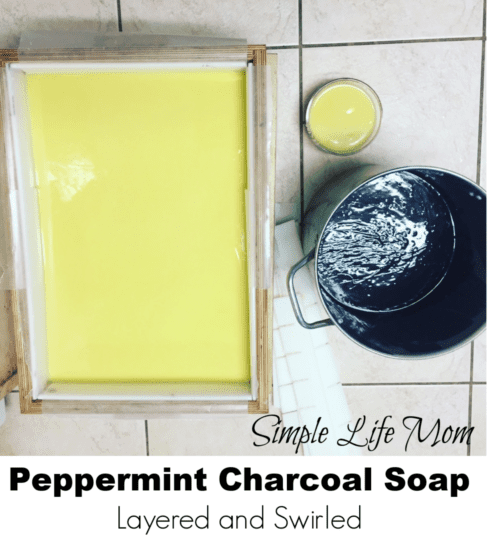
Add charcoal to the large main batch, combine, and you’re ready to go to work.
Layering Colors
You’ll need to move quickly and carefully. Slowly scoop or pour the charcoal soap over a spatula onto the white soap layer. Smooth the charcoal layer as best you can over the top.
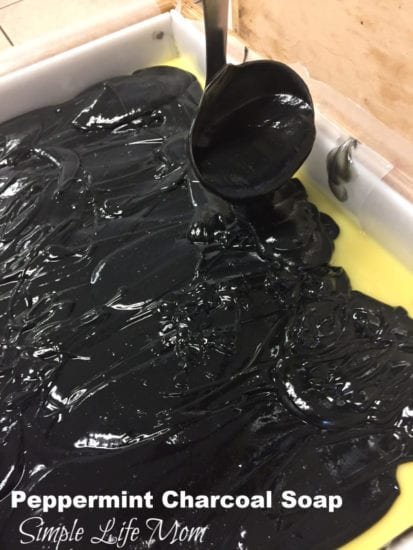
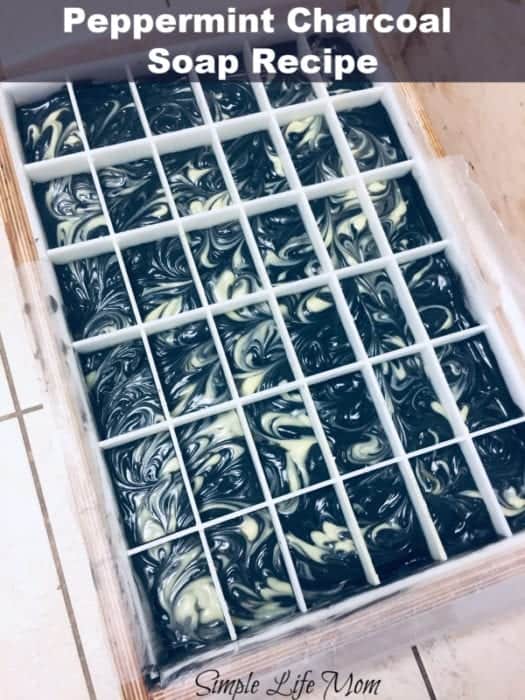
My soap was hardening very quickly, so by the time I took a few pictures and went to drizzle the white soap over the top for layers, I had a thick pudding like consistency to work with. Not to be discouraged, I went ahead and blobbed it onto the top of my soap in horizontal “lines”. This is what I mean about soap making often being very forgiving. Swirls are the most easily beautiful creation to make in soap, because they can start off being messy blobs and end up in beautiful designs.
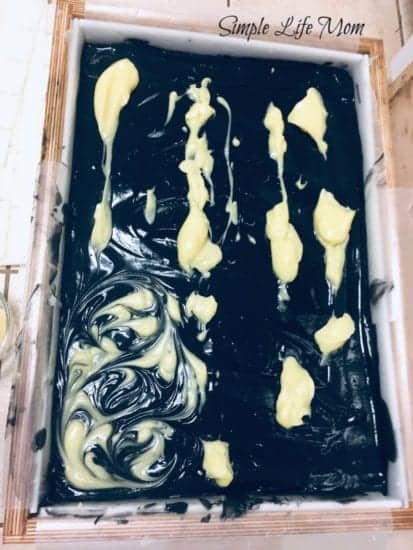
I literally just took a dowel rod and made tiny swirls until I was happy with how it looked. Be careful not to put the dowel rod down to the bottom. You don’t want to ruin that bottom flat layer.
Peppermint Charcoal Soap Recipe
This recipe is for 12 four ounce bars or 48oz. 5% Superfat content.
Ingredients:
- 13 ounces Tallow
- 11 ounces Olive Oil
- 8 ounces Coconut Oil
- 11.2 ounces Water
- 4.6 ounces Lye
- 4 – 1/2 teaspoons Activated Charcoal Powder
- 1 ounce Peppermint Essential Oil
Directions:
- Combine oils and fats in a large pot. Melt and cool to 100 degrees Fahrenheit.
- Wearing appropriate safety equipment, go outside and add lye to water and stir until dissolved. Let cool until it is around 100 degrees Fahrenheit.
- When both oils and lye water are at desired temperatures, pour lye water into oils and use a stick blender to blend on and off until light-medium trace.
- Add essential oil and blend.
- Pour a thin layer of cream colored soap into a lined mold.
- Remove 1 cup of cream colored soap and set aside.
- Slowly pour black soap into the mold. Use a spatula to catch the flow so that it gently lays into the mold. Smooth with a spatula.
- Take the cup of cream soap that you removed and pour it in horizontal stripes back and forth over the mold. Then take a dowel rod and carefully, without touching the bottom and ruining your bottom layer, swirl the dowel rod in small circles to drag the white soap into pretty swirls on the top of your batch.
- Cover and insulate for 24 hours.
- Remove, cut, and cure for 4-6 weeks.



51 Comments
Leave your reply.