Soap making is a creative craft that allows you to express your artistic abilities, learn a new skill and improve upon it over the year, make something healthier than store bough versions, and it means you are learning an age old skill that can be very valuable for you in the future. Surprisingly, you can make soap with kids as well.
How does this translate to soap making with children? After all, you must use lye to make soap. If you are not using lye, then you are designing soap that someone else already made for you. This is totally fine, and a great stepping stone for those getting started. But it’s also a great place to start with kids.
Make Soap With Kids – Types of Soap Making
There are different method for making soap.
Soaps made from scratch are made with the hot or cold processes.
Soap that is already made that you are designing (adding scent, color, and swirls, etc.) is either melt and pour or hand mill (also called French-milling). Because the soap is already made, you will simply be melting the soap instead of combining oils and lye water. No lye is involved in melt and pour or hand milling.
I do not recommend making hot or cold process with children below the age of twelve. Twelve year olds can handle lye with careful adult supervision. I’ve taught soap making classes to children this age and they always do wonderfully WITH careful and constant adult supervision.
Cold Process
Cold process is taking the oils and melting them in a large pot and cooling them to about 90F to room temperature. At the same time, lye is added to water and allowed to cool to the same degree. After they are stirred together the soap will begin to thicken. It is then added to a soap mold and allowed to set for 24 hours. It is then removed from the mold, cut, and allowed to cure for 3-6 weeks. The saponification process is done after 2-4 days, but the soap will continue to harden for the following weeks.
Lye always must be used with caution as it gives off a gas from the chemical reaction when it is added to water (for about 3 minutes), and it can burn the skin if it comes in contact with it. Always use goggles, charcoal mask (any other mask does nothing to protect you from fumes), and gloves. If a drop splashes on the skin you will feel and itch and then a burn after a minute or two so simply wash it off if it happens. It’s nothing to be afraid of, just keep it off your skin.
**Note: How can this be natural and make a healthy soap? Lye is needed for the chemical reaction with the oils. It busts the molecules apart and bonds to create long salt chains with glycerin (soap)! NO lye is left in the soap. It is all used up. Soapmakers create recipes to have oils leftover to make sure that all the lye is used up. This is called superfatting or lye discounting.
Hot Process
Hot processing still uses the oil and lye water combination, but instead of stirring in a pot and then pouring into the mold when it thickens (comes to trace), the oils are added to a slow cooker and the lye water is then added to that and stirred until it begins to thicken. The slow cooker is then sealed with plastic wrap over the top and allowed to cook on the lowest setting until the entire mixture thickens to a mashed potato looking consistency. It is then poured into a soap mold and allowed to cool. Because so much water is lost in the process, it is ready to use as soon as it cools.
This type of soap making usually makes a more chunky, rustic looking soap than cold process.
Melt & Pour
Melt and pour is made by doing what it says.
Soap that has already been made by someone else (They used lye and oils just as you would in the cold process method) is cut into small cubes, added to a double boiler or placed in a microwave, and melted. Scent and color is added if desired and then it is poured into a mold.
This method allows people to creatively scent and decorate soap without having to make it themselves. Since the lye was already used within the first making of the soap before purchasing, there is no concern of chemical burns. As with all soap making, there is a hot pot (and the soap is hot as well), so caution should be taken. If your child helps out in the kitchen around the stove already then this will not be an issue.
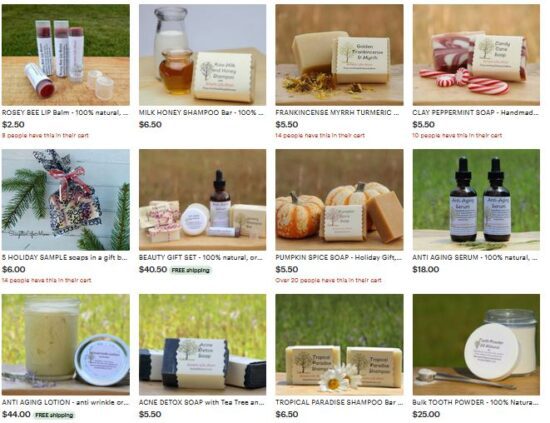
You can buy melt and pour with PURE ingredients in my shop.
Hand-Milling
Hand-milling is similar to melt and pour, but gives a different textured end product. Where melt and pour has glycerin added to create a smooth melt so that the end product is very smooth and similar to a cold processed soap bar, hand-milled soap takes soap that has already been made (just like melt and pour) but that soap is most often gathered from leftover pieces of soap around the home or a botched batch of cold processed soap.
To hand-mill, you need soap that is already made. This is then grated with a cheese grater or placed in a food processor. This milled soap is placed in a slow cooker on the slowest setting. A small amount of water is added before the lid is sealed (preferably with plastic wrap) and allowed to fully melt. It will bubble into a mashed potato consistency. When finished, add color and scent and then scoop into a mold.
Tips For Soap Making With Children
There are a number of practices that make soap making with children a lot safer and easier. Children CAN make soap with you under careful supervision. Age matters! If they are too small to cook at a stove, then they are too small to make soap. This doesn’t mean they can’t help!
Small Children
Smaller children can choose colors and scents.
They can also help stir color into melt and pour soap with a dowel rod. Just make sure you are right there to make sure they don’t stick their finger in hot soap. I have friends who have had their 4 year old’s help make melt and pour in this way. Her kids were so excited and proud of their work that they couldn’t wait to use it in the bath.
7-12 Year Olds
I still don’t let children aged 7-12 do more than melt and pour and hand-mill.
Most 7-12 year olds can do more than smaller children though. They can not only choose scents and colors, but can also carefully cut melt and pour soap or grate hand-milled soap into small pieces.
They can stir the soap as it melts, and help add and stir in the scent and color.
12 Years and Up
This age is typically ready to make cold process and hot process soap (as well and hand-mill and melt and pour of course).
I’ve taught classes with 12 year olds and they did wonderfully! We always go over safety first and explain why. They wear full protective gear of long sleeves, goggles, and gloves. Whoever helps me pour the lye into the water wears a full charcoal mask.
They are very careful and respectful. If you are in a situation where you will not be able to observe everyone or have some rambunctious kids, then you need to wait a few years or make sure you are teaching one on one.
I’ve had many teens come back and show me their own beautiful creations months after class. Moms contact me to ask if they’ve bought everything successfully since their teen is now highly into this new craft. That’s always exciting to hear!
A Simple Melt and Pour Recipe
You will need to purchase a 2lb block of melt and pour soap or this recipe. It is VERY hard to find melt and pour soap without a TON of toxic ingredients. This is why I started selling melt and pour blocks in my shop. It isn’t as liquid as some of the options out there, but it works very well and are 100% organic.
Makes: 2lbs or 8 four-ounce bars
Equipment Needed:
- 2 pounds melt and pour soap
- large glass bowl
- sauce pan
- rubber spatula
- stick blender
- plastic wrap
- knife
- soap mold
Ingredients:
- 2 pounds soap cut into 1 inch cubes
Directions:
- Create a double boiler by placing a glass bowl (or large glass measuring cup) over a sauce pan half filled with water and bring water to a boil.
- Cut 2 pounds of melt and pour soap into 1 inch cubes and place in glass bowl over double boiler.
- Cover with plastic wrap to preserve moisture and melt fully.
- Remove cover and blend with stick blender if needed.
- If you would like to add essential oils, add about 0.75 ounces now and blend.
- Scrape into prepared mold (some need a layer of plastic wrap so the soap comes out easily) and allow to cool and harden. Remove from the mold and cut into 8 four-ounce bars if necessary. They are ready to use as soon as they are hard.
A Simple Hot Process Recipe
Get in-depth instructions with pictures here: Hot Process Soap Making
Makes: 2 pounds or 8 four-ounce bars
Superfat content (oils leftover after lye is used up): 10%
Equipment Needed:
- food scale
- large glass bowl
- slow cooker
- large stainless spoon
- rubber spatula
- stick blender
- plastic wrap
- soap mold
Ingredients:
- 10 ounces olive oil
- 7 ounces coconut oil
- 5 ounces shea butter
- 2 ounces grapeseed oil
- 3.2 ounces lye
- 7.7 ounces water
- 0.75 ounces essential oil (optional)
Directions:
- Combine olive oil, coconut oil, shea butter, and grapeseed oil in the slow cooker on low. Cover and allow to melt fully.
- Put on disposable glove. Weigh lye into a zip close bag and set aside. Weigh water. With gloves still one, also wear goggles and a charcoal mask (surgical masks are worthless) and go outside with the lye and water. Pour the lye into the water and stir until dissolved. Lye will give off a gas (from the chemical reaction) for a few minutes. During this time it will get hot. Let it cool to around 90 degrees Fahrenheit.
- Bring lye water inside and carefully pour it into the slow cooker oils. Use a stick blender to blend until light trace (The soap will begin to thicken). Cover with plastic wrap and allow to cook on low heat.
- The soap will begin to bubble from the outside in. When the entire batch is bubbly like mashed potatoes, remove the cover and blend. Do not remove the cover before this or you will lose moisture and the texture of the soap will be more dry and rustic.
- If you would like to add essential oils, now is the time. Add and blend.
- Scoop soap into a prepared mold and allow to cool. It will be ready to remove from the mold when it is cool and hardened enough to hold its shape. Allow to harden 24-48 hours and then cut into 8 four-ounce bars if needed. Feel free to use as soon as you are happy with the hardness.
A Simple Cold Process Soap Recipe
Get step by step instructions here: 7 Easy Steps for Lye Soap for Beginners.
Or check out one of my books: Natural Soap Making Book for Beginners and Easy Soap Making by Kelly Cable (Easy soap making has melt and pour recipes as well).
This is the same recipe as the hot process above. You’ll notice that just the process is different. Familiarize yourself with one and then try the other!
Makes: 2 pounds or 8 four-ounce bars
Superfat content (oils leftover after lye is used up): 10%
Equipment Needed:
- food scale
- large glass bowl
- large stainless steel pot
- large stainless spoon
- rubber spatula
- stick blender
- soap mold
Ingredients:
- 10 ounces olive oil
- 7 ounces coconut oil
- 5 ounces shea butter
- 2 ounces grapeseed oil
- 3.2 ounces lye
- 7.7 ounces water
- 0.75 ounces essential oil (optional)
Directions:
- Combine olive oil, coconut oil, shea butter, and grapeseed oil in a stainless steel pot on medium to low heat. Remove from heat as soon as the oils are melted. Cool to 90-100 degrees Fahrenheit.
- Put on disposable glove. Weigh lye into a zip close bag and set aside. Weigh water. With gloves still one, also wear goggles and a charcoal mask (surgical masks are worthless) and go outside with the lye and water. Pour the lye into the water and stir until dissolved. Lye will give off a gas (from the chemical reaction) for a few minutes. During this time it will get hot. Let it cool to around 90 degrees Fahrenheit.
- Bring lye water inside and carefully pour it into the pot of oils. Use a stick blender to blend until light trace (The soap will begin to thicken).
- If you would like to add essential oils, now is the time. Add and blend.
- Pour soap into a prepared mold. Cover and insulate with a towel for 24 hours.
- After 24 hours, remove from the mold and cut the soap into 4 ounce bars if needed. if the soap is too soft to remove, wait another 24 hours and check again. Let cure for 4-6 weeks.
Note: Why choose cold process? You will get a smooth pretty finish, whereas hot process is often (not always) chunky and rustic looking. I love both!



8 Comments
Leave your reply.