I’m excited to share with you a new and updated tutorial on how to make soap from scratch. My first step by step guide is 7 easy Steps to Homemade Soap for Beginners. It’s a great guide and I encourage you to head over there and read that article as well.
The reason that I wanted to write a new guide is because over the past 15 years my soap making likes, dislikes, habits, and everything I have learned has changed. In that same time period I’ve published multiple books, including two physical books that you can find in most book stores and many libraries today. After all that, I just had to put an update on my website.
Here are my Soap books:
- The Natural Soap Making Book for Beginners (Still an Amazon #1 best seller)
- Easy Soap Making
- Natural Soap Making How-to and Recipe Book
- How to Use Herbs and Essential Oils in Soap Making
Types of Soap Making
There are 2 types of Soap Making: Cold Process, Hot Process.
There are many types of Soap Designing: Melt and Pour, Hand Mill, and I’m sure many others.
Cold and Hot Process soap making use a chemical reaction to change oils into soap. That chemical reaction is created by using lye. No lye = no soap! No way around that.
Melt and Pour and Hand Milling Soap use soap that someone already made for you and then melt or grind it down to melt and create your own soap design and scent. It’s fun, easy, and safe for most young children to start soap making.
Click here to Learn How to Make Soap With Children.
And Click Here to Learn the Difference Between Melt and Pour and Cold Process.
Click Here to Learn More About Hand Milling.
Cold Process and Hot Process use the same ingredients.
The cold process pours the soap into a mold and lets it set for 24 hours, then cuts and cures it for 3-6 weeks for it to harden.
The hot process heats the soap before it’s poured into a mold so that after about 24 hours when it’s time to take it out of the mold it’s already hard and ready to use. This method often looks more rustic than cold process, but the heating process evaporates enough of the water to make the soap hard within hours instead of weeks. For this reason, many home soap makers like the hot process method.
I like the cold process soap making method the best because of the smooth finish and the freedom to design that the slower cold process gives you (though I’ve seen some amazing hot processors who can put beautiful designs in their soap).
Contrary to popular internet rumor, the saponification process (turning the oil into soap and using up all -100%- of the lye) is finished within the same time for cold and hot processing. This time frame is between 36-48 hours. After this time frame there is no longer any saponification happening within the soap bars, but cold processed soap bars still need to sit and harden for a few weeks (3-6 for hard long lasting bars). During this time, water will evaporate and the bar will harden.
The process described below is for the Cold Process Method. You can always adapt these skills to make hot process in the future very simply.
Supplies Needed to Make Soap From Scratch
Lye reacts to many metals. Use glass, plastic, and stainless steel for all of your equipment that touches the lye, lye water, or processing soap.
You will need:
- Large Stainless Steel Pot (deeper is better so you don’t get splashed as you mix)
- Large Stainless Steel Spoon
- Stick Blender (you can use a whisk or hand mixer but you will be blending a long time!)
- Food Scale
- Large Glass Bowl (to measure ingredients)
- Rubber Spatula (to scrape all the ingredients into, and later out of, the pot)
- Food Thermometer (a cheap candy thermometer works fine)
- Mold (more on this below)
- Mold liner (more on this below)
- Knife or soap cutting tool
The Best Soap Molds and Liners
Molds
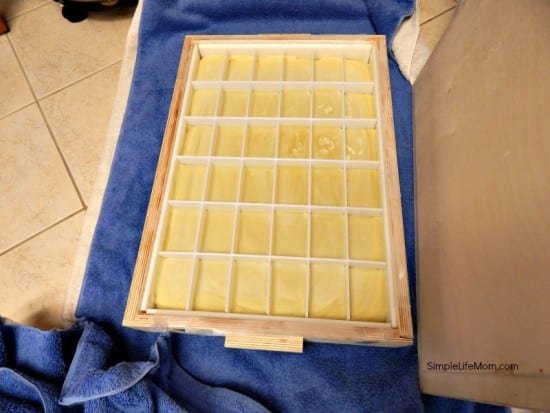
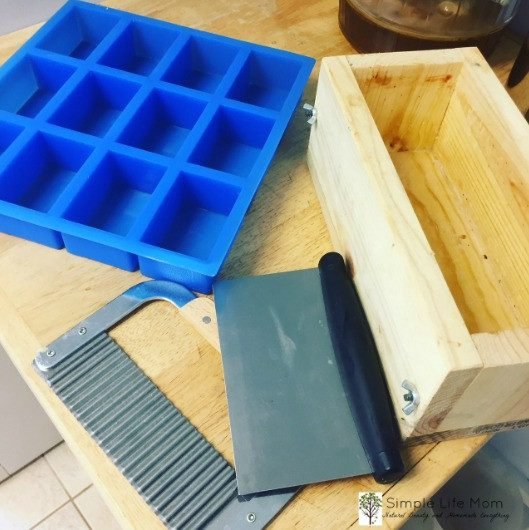
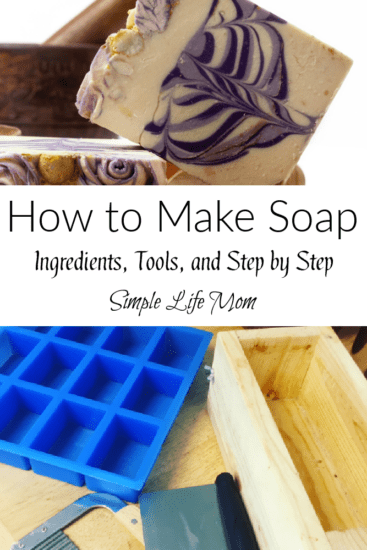
There are a lot of different types of molds. One option is to purchase a wooden “loaf” mold that is shaped like a loaf of bread. You will need to cut the soap into pieces after it hardens. There are also wooden slab molds. This is what I have. It is wide and low and makes 36 bars at a time, but you can find them in a smaller size. This mold has a plastic insert and plastic dividers. It’s ideal for me, because I can’t cut a bar straight for anything.
There are also silicone molds. I’m not a fan, because I don’t like waiting the extra day before removing them from the mold and corners always seem to be destroyed. This is due to my impatience, so I’m sure you can figure out how to use one successfully. The good part about them is that you don’t need a liner. The soap does suction to the sides, but after it hardens (or after you stick it in the freezer for a little while) you can pop the suction off and pop the soap out.
I do not recommend using glass. I’ve read that you can put them in the freezer and the soap comes out easier…not so. There is no give and you can’t bang them on the counter like you can a wooden mold to get the soap to come out.
You can use cardboard boxes or even round chip cans though. I’ve also used a large pvc pipe to make round soap and it worked beautifully, though the end was a little mauled from the effort to push it out.
Liners
Line wooden molds if they don’t come apart on all sides, or if you do not have silicone or plastic inserts. You can use wax paper. It peels off easily and helps the soap slide right out of the mold.
If a plastic insert came with the mold you chose to buy, then no additional liner is needed, but I do use parchment paper in addition to my plastic liners for large batches. You’ll figure out what works best for you.
Ingredients Needed to Make Soap
You must have good quality ingredients to make good soap.
You also need more than one oil to make good soap.
This is why: each oil brings its own quality to a bar of soap. One oil helps make the soap bubbly, while another cleanses. Another adds moisture, while another helps harden. While they all help in multiple ways, most are very good in one particular area.
For example, coconut oil is very cleansing, while olive oil is a very poor cleanser. Too much coconut oil without adjusting superfat content (more on that below) and your soap will dry out and crack people’s skin. A 100% olive oil bar is like washing with water. Yes, olive oil bars are very popular, but they don’t have cleansing ability. They feel good and make a gentle, smooth bar, but don’t get much done that water and a wash cloth couldn’t do (Yes, I’m opinionated after soaping for 20 years).
Balance is important. In my Easy Soap Making book my publisher pushed me to make bars with only one oil each. I refused, because I wanted you to be extremely happy with the end product. I ended up putting together recipes with the least amount of oils, while still being rounded and nourishing. If you’re looking for simple recipes that make great soaps then definitely check out that book.
Click Here to Learn about What Each Oil Brings to Soap.
Ingredients Needed:
- Oils
- Lye
- Water
Yes, only three types of ingredients! This will give you a basic unscented soap, laundry soap, hand soap, shampoo bar, body soap, face soap, you name it!
The variety (without scent and color) comes in by varying the oils used, as well as how much of the oil is leftover after the lye is all used up (superfat content).
Optional Ingredients:
- Essential Oils for Scent
- Herbs and Clays for Coloring
- Herbs for decoration
If you want to add scent to your soap, then definitely use essential oils. Use good quality essential oils or your soap will sweat and have problems. I like to use Starwest Botanicals or Mountain Rose Herbs.
I use about 0.33 ounce of essential oil per pound of soap. This will change slightly, depending on the note and depth of the scent. You can learn how to layer and add essential oils to soap in my ebook: How to Use Herbs and Essential Oils in Soap Making.
Fragrance oils can cause difficulties for new soap makers (sweating, seizing up, overheating) and I do not think they are healthy. I would much rather use something that is straight from a plant and not a lab. Click here for more on fragrance oils.
There are so many ways to decorate soap with herbs and clays!
If you want an EXTREMELY thorough list and full charts on how to use herbs to color soap then I do recommend getting The Natural Soap Making Book for Beginners.
I do have a few places on my website with charts:
Preparing to Make Soap from Scratch
I always say, if you can bake a cake from scratch, then you can make soap from scratch.
It’s basically following a recipe. You CAN do it!
Think of your ingredients in three categories:
- Oils and Fats
- Lye and Water
- Natural Additives
Oils and Fats
Place a large glass bowl on a kitchen scale and push the Tare button. This will set your scale to zero.
Weigh the oils/fats in your recipe carefully and use a rubber spatula to scrape them into a large stainless steel pot. Be precise. The smaller the recipes, the more precise you need to be.
Once all the oils, butters, and fats are in the pot, melt them. Watch the pot so that you can remove it from heat as soon as everything is melted so that it can begin to cool.
Lye and Water
Lye is a minimally processed salt. It is extremely basic on the pH scale, about the same as toilet cleaner. You will need to purchase sodium hydroxide lye crystals that do not have any other additives. Do not buy liquid lye. You can find lye in the plumbing section of a hardware store or online.
Bare minimum safety equipment:
Lye reacts to water. Moisture on your skin can cause lye to react on your skin. If it does, you will feel an itch and then a burn. When you feel the itch, go wash immediately. After 20 years of making soap though, I must emphasize that risking it without gloves is just not worth it. Even the steam that comes off of the lye water while you’re stirring can cause your hand to itch and then burn (which is why the lye water is stirred outside), so use gloves and possibly long sleeves as well.
The mask is needed because, as I just mentioned, there is a chemical reaction when lye is poured into the water. There is a rapid heating (release of energy) from the chemical reaction. This causes steam that has some lye in it. Do not breathe this in! A regular cloth mask does absolutely nothing! Use must have a charcoal filtered mask or the water molecules will go right through the mask and into your lungs.
All that being said, don’t be scared. You will pour the lye into the water while outside, stir it until the lye is dissolved, and then leave it outside in a safe place from pets or children until it is cooled. It stops giving off steam after 2-3 minutes.
Step 1
Using a plastic storage container, weigh water and take it outside to a place where no pets or children can touch it.
Step 2
Weigh the lye by scooping or pouring it into a plastic zip close bag.
Step 3
Take the lye outside and, wearing a mask and gloves, pour lye into the water and stir until dissolved. Leave it outside until steam has finished (2-3 minutes) or until it is cooled. Make sure that everyone in the home knows about the lye water and that it is away from children and pets until ready to use.
Natural Additives
Prepare natural additives like clays for coloring and essential oils for scent. I add 0.33 ounces of essential oil per pound of soap.
See links above for adding coloring to soap.
How to Make Soap Step by Step
Weigh and Melt Oils
As explained above, weigh oils, butters and fats and scrape them into a large pot. Melt them and allow them to cool. I used to soap around 110-120 degrees Fahrenheit. I now soap at 80F. It comes to trace (thickens) at almost the same rate and I seem to have less issues with soda ash.
Soda ash is when soap develops a white layer on the outside. It’s just cosmetic unless the soap sits in a very cold room and is damaged all the way through. Soda ash usually occurs with drastic temperature changes. Combining oils and lye water when they are closer to room temperature and then keeping the mold warm lessens the chance for soda ash in my experience.
Weigh and Combine Lye and Water
Weigh water and set aside. Put on gloves and a charcoal filtered mask and weigh lye into a zip close bag that can be thrown away. Take both outside and pour the lye into the water and stir until dissolved. Let cool to around 80-90 degrees Fahrenheit in an area that will not be touched by children or pets.
Combine Oils and Lye Water
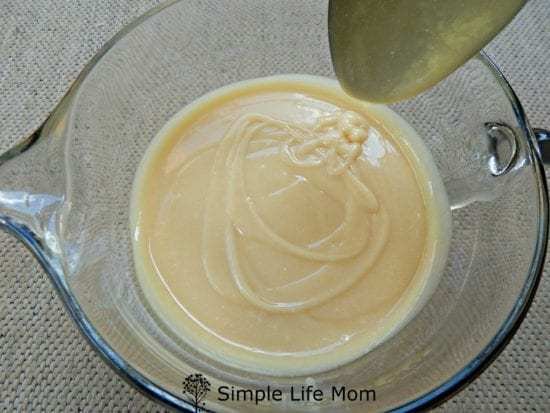
When both oils and lye water are 80-90 degrees Fahrenheit, carefully pour the lye water into the pot of oils and mix with a stick blender on and off until it begins to thicken. This is called beginning trace. When a spoon of the soap is drizzled over the surface it leaves a trail, or trace. Thin to thick trace is used for different decorating techniques. Thick trace is better for layering or swirling a pretty color into the top.
Click here to Learn More About Trace.
Add Natural Additives
Most additives are added at trace, though some are added to the oils or lye water for a richer color. Other herbs are added to the top of the soap after pouring.
When soap is at trace, add essential oils and other coloring and blend well.
Pour into the Mold
Scrape soap into the prepared mold (lined if necessary) and cover well. Soap should be around 80 degrees when curing for the first 24 hours. Place towels under and over the covered mold during winter months and monitor for the correct temperature in the summer months. You don’t want it to over heat either. Signs of over heating are little bubbles or cracking formed over a amber gel like surface.
Soap will go through a ”gel phase”. It will turn from the natural cream color to a darker gel, then back to cream. This is a good thing because it will make a harder bar and brighter colors.
Don’t confuse the gel phase with overheating. It can look similar, but when overheating, soap will develop little bubbles and if very hot it will crack.
Cut Soap
After 24 hours, remove the soap from the mold. If it is soft and fingers are leaving marks you can leave the soap in the mold for another 24 hours. If using a silicone mold you can put the mold in the fridge to help harden the soap to make it easier to remove.
How to Make Soap – Get RECIPES!
You can get started right away with recipes on my website: Handmade Soap.
I have everything from shampoo bars, face bars, laundry bars, body bars, to bars to help with poison ivy and acne. Let me know if there is anything specific that you are looking for that you don’t see.
Don’t forget to stop over at 7 easy Steps to Homemade Lye Soap for Beginners to learn more.



3 Comments
Leave your reply.