
• Books
    • All E-Books
    • The Natural Soapmaking Book for Beginners
    • Easy Soap Making Book
  • Food
  • Soap Recipes
  • Beauty
  • Home and Garden
    • Holidays
  • Herbs and Essential Oils
  • Homestead Hop
  • Shop
  • Blog
Simple Life MomSimple Life Mom
  • Books
    • All E-Books
    • The Natural Soapmaking Book for Beginners
    • Easy Soap Making Book
  • Food
  • Soap Recipes
  • Beauty
  • Home and Garden
    • Holidays
  • Herbs and Essential Oils
  • Homestead Hop
  • Shop
  • Blog

Easy Melt and Pour Base Recipe from Scratch

Posted by Kelly Handmade Soap, Homemade Soap Recipes, Soap Instructions and Ideas 32 comments
Please Share

This is a project that I’ve been working on for about a year now: how to make a melt and pour base recipe from scratch with only pure and healthy ingredients.

I’ve been tweaking the recipe, not wanting to just say, “This is as good as it gets.” But wanting to improve the end texture and experience so that more people around the world can make melt and pour soap with healthy ingredients only – No compromises!
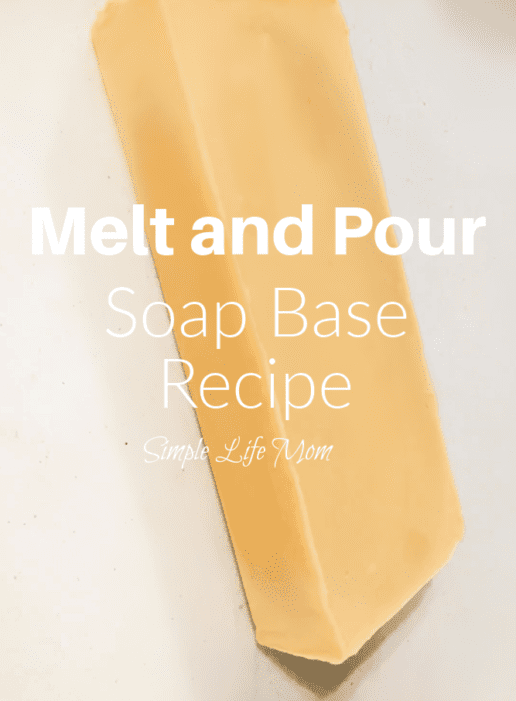
Melt and Pour Soap Base recipe with natural ingredients from Simple Life Mom

What is Melt and Pour Soap?

Melt and pour soap is a soap base that is ready made for you (See this one in my shop). These soap bases are purchased at craft stores or online so that crafters can start a new project without having to make soap from scratch.

I think melt and pour soap bases are a great way for people to get started easily and more simply into soap making. After all, you will familiarize yourself with soap textures, adding scents, and adding color to soap. It’s something that can be done around children and pets more easily, because you don’t have to worry about lye water sitting and cooling in an off limits zone outside or in your garage. Instead, the soap block is ready made for you.

To use a melt and pour base, a crafter will cut it into small squares and place them in a glass bowl. They will then either microwave the soap in short bursts, or place the bowl over a double boiler to melt the soap to a more liquid form.

Once the soap is more toward a liquid form, you can add essential oils and other additions (not too much because the soap is already made for you) and coloring and pour the melted soap into cute soap molds like these or these.

It’s that simple: melt, then pour.

So, why would I offer a melt and pour base recipe?

Typical Melt and Pour Bases for Sale

I’m offering my own melt and pour recipe for two reasons. First, a lot of you who use my website have your own shops. I’ve had friends tell me, you have a shop! Why give away your recipes! Because I want people to learn. And also, people who want to make, will make. And people who want to buy, will buy. I love to encourage people to make their own soaps and help others to as well.

Plus, I’ve made a lot of connections and am grateful when people give proper credit.

But most importantly, if you have used melt and pour soap bases and read the instructions, you know that they are ALL full of junk!

When I first started looking into it, I thought surely I could find some melt and pour soap bases out there that didn’t have toxic or at least questionable ingredients. Nope! A lot of them, most of them, have ingredients that are banned in other countries due to their toxic nature.

There’s a reason for this. In order to get soap to melt to a liquid state that is easy to pour and manipulate, you need to add some questionable ingredients.

Well, you know I’m not about to do that.

Changes to the Melt and Pour Base

My melt and pour soap base recipe is thicker. I have tried a number of methods to naturally get the soap to melt to a thinner consistency. I have not found a way yet.

The desire is for a thin enough consistency that can be manipulated, as well as a soap base that will cool and harden in a pretty way.

For this to happen, you need to use creamier oils and more glycerin. Glycerin really is the key.

I’ve managed to create a soap base that is made with only 100% natural, pure, and healthy ingredients that will melt to a thinner scoopable if not pourable consistency, that cools to a pretty, hard bar.

You can find the base in my shop if you’d like to try it out there first. You can also read the reviews.

You’ll notice that some people don’t follow my instructions and have a harder time manipulating it. So check out the instructions very carefully below. If followed properly (just one or two extra steps and pointers) it’s a great melt and pour base. And a base that you KNOW is 100% healthy.

My Melt and Pour Base Recipe

This recipe has a 5% Superfat and makes 2 pounds of soap base.

You’ll need to cold process this soap recipe before you can use it as a soap base later on. It can be used after a few days. It does not need the weeks to harden. For more detailed cold process soap making instructions see the article, Step by Step Soap Making, or The Natural Soap Making Book for Beginners.
Melt and Pour Soap Base Recipe with organic ingredients from Simple Life Mom
Pin Recipe Print Recipe
5 from 9 votes

Melt and Pour Soap Base

This soap base recipe uses only natural and healthy ingredients.
Prep Time30 minutes mins
Insulation Time1 day d
Cure Time21 days d
Type: soap base
Superfat %: 5%
Keyword: cold process soap, melt and pour, soap base
Makes: 2 pounds
Author: Kelly

Equipment

  • 1 large stainless steel pot
  • 1 large spoon
  • 1 scale
  • 1 large glass bowl
  • 1 stick blender
  • 1 2lb mold
  • 1 rubber spatula

Ingredients

  • 6 ounces olive oil
  • 6 ounces coconut oil
  • 3 ounces sweet almond oil
  • 3 ounces apricot kernel oil
  • 2 ounces avocado oil
  • 2 ounces shea butter
  • 2 ounces castor oil
  • 5 ounces glycerin
  • 6 ounces water
  • 3.4 ounces lye

Instructions

  • Combine olive oil, coconut oil, sweet almond oil, apricot kernel oil, avocado oil, shea butter, and castor oil in a large stainless steel pot over medium heat to melt the coconut oil. Cool to around 80 degrees Fahrenheit.
  • Wearing protective gloves, goggles, and mask, take the lye and water outside and pour the lye into the water. Stir until it is dissolved. Allow to cool to around 80 degrees Fahrenheit.
  • Add glycerin to oils.
  • Add lye water to oils and blend with stick blender until light trace.
  • Pour soap into a 2lb mold and cover with towels to insulate for 24 hours.

Notes

See notes below for how to use melt and pour soap base.

How to Use my Melt and Pour Base

I give the difference between cold process and melt and pour here (You can also get a recipe). You can also learn how to swirl melt and pour soap, or how to add layers.

To use this melt and pour soap base, cut the soap into small cubes as you would any soap base.

I prefer the stove top or slow cooker method, because it’s very easy to scald the soap in the microwave. But if you’re having problems getting the soap to melt, you can try the microwave carefully.

Stove Top or slow cooker:

For stove top, create a double boiler by placing a saucepan of water over medium heat. Place a glass bowl or large glass measuring cup over water.

Cut the soap into small squares or shred it with a cheese grater and place the soap in a glass bowl.

Cover the bowl in plastic wrap as it melts. This is very important, because when it loses too much moisture it will not have the right consistency or cool as nicely as it would otherwise.

If it is too thick and more like mashed potatoes than pourable soap, add one teaspoon of oil for each pound of soap and stir. Blend with a stick blender and re-cover the soap (watch for hot splashes). This oil can be part of the additions you wanted to add. For example if you wanted to add rosehip oil or goat’s milk, this would be the time.

After it is melted, add scent and coloring if desired. Mix well and then pour the soap into your prepared mold.

Use can use the same method with a slow cooker, making sure to cover the top in plastic wrap to keep in the moisture.

Microwave:

Only melt 1 pound at a time. You’ll need to divide the soap base in half. Cut that half into small cubes and place them in a glass bowl. 

Melt in the microwave in 30 second bursts, stirring in-between. If it seems to thick, add a teaspoon of oil per pound of soap that you are using. You can also use water or milk. You’ll need to use a stick blender to blend the soap. Be careful of hot splashes.

When melted, add scent and color if desired and pour into a prepared mold.

Repeat with the other half of the soap if desired.

Leave a comment below about what your favorite melt and pour scent or addition!


Please Share
32 comments

About Kelly

Kelly is the author of number one best seller The Natural Soap Making Book for Beginners and Easy Soap Making. She's also written multiple ebooks on herbal remedies and natural bath and body DIYs. Her journey toward better health has inspired her to make things in and around the home from scratch, start a homestead, and become more resourceful when it comes to health and home. She shares her recipes and DIYs here on Simple Life Mom and has a shop where she sells products for those who would rather buy than make (SimpleLifeMom.com/shop).

You also might be interested in

Homestead Blog Hop - Homestead tips, ideas, animal care, and recipes every Wednesday

Homestead Blog Hop 587 – DIY Restorations and Cold Weather Projects

Feb 17, 2026

Please Share Welcome to Homestead Blog Hop, a weekly gathering[...]

Swirling Melt and Pour Soap, how to, recipe, correct temperatures, and herbal colorants

Learn How to Swirl Melt and Pour Soap

Jul 11, 2021

Please Share I’m a cold process girl. Probably because I’m[...]

Soap for Men – How to Make 3 Hot & Cold Process Recipes

Soap for Men – How to Make 3 Hot & Cold Process Recipes

Jun 12, 2023

Please Share Though men are known to like all types[...]

32 comments

Leave your reply.
  • Lily
    · Reply

    March 11, 2024 at 8:52 AM

    5 stars
    I love to try ASAP the lovely base soap recipe, thank you

  • Kelly
    · Reply

    Author
    March 11, 2024 at 8:57 AM

    5 stars
    Don’t forget to leave your comments. How did you like this recipe and what’s your favorite melt and pour additions?

  • Kait
    · Reply

    June 6, 2024 at 4:31 PM

    Hi there! Thanks for the recipe. How long does this process take you? This is the first melt and pour recipe I’ve seen where the glycerin is added before the lye. Normally the cook is about 30 minutes to 1 hour long then the glycerin is added. It’s typically another 15 mins to 1 hour longer to fully incorporate the glycerin. This one seems a lot shorter! I appreciate any guidance you can offer me as I would like to try this recipe.

    • Kelly
      · Reply

      Author
      June 6, 2024 at 5:07 PM

      Hi Kait,
      Great question! First, it sounds like you were working with a hot process soap recipe. This is cold process. Second, it also sounds like you are making a glycerin soap that’s clear when you’re done, correct? This is a cream colored soap when finished. The glycerin is added to help the soap melt after being cold processed. I hope that clears things up. Feel free to ask more questions!

  • Kait
    · Reply

    June 6, 2024 at 6:02 PM

    5 stars
    Wow, I’ve never heard of a cold process melt and pour recipe before! Yes, the other recipes were hot process. Amazing! Really wonderful job here. The fact you spent a year formulating this recipe and were kind enough to share it is rare. Hats off to you and may God bless you and your future endeavors. I’m so excited to try this and will leave another comment when I do! I do have one more question though. I’m a new soap maker and usually pour my batter at a thicker trace. I will do my best to pour this at a light trace. If, however, I pour at a medium trace, would this affect the meltability?

    • Kelly
      · Reply

      Author
      June 9, 2024 at 12:54 PM

      You’re welcome! No, the trace won’t make a difference.

  • Frida
    · Reply

    June 9, 2024 at 11:37 AM

    5 stars
    Thank you very much for doing all this for us.
    Very much appreciated.Please my question is should the water be also heated or should it be cold because am a bit confused.

    Thanks alot

    • Kelly
      · Reply

      Author
      June 9, 2024 at 12:53 PM

      The water should be cold. When you add the lye it will heat because of the chemical reaction. Do not breathe in the vapors. It will give off vapors for 1-2 minutes. Let it cool to about room temperature. Be careful not to touch it before adding it to the oils.

  • Emily
    · Reply

    June 14, 2024 at 11:06 AM

    5 stars
    Thank you so much for sharing your recipe! I am new to soap making and want to make an all natural bar that I can re-melt and put into fun molds. I was wondering, how soon are we able to safely start using the soap? I saw in your description a few days is best, maybe more to cure better. Im most concerned about using it too early and having the Lye irritate my skin. I made a batch yesterday and would like to use it as soon as possible. How many days or weeks do you usually wait?

    • Kelly
      · Reply

      Author
      June 16, 2024 at 11:36 AM

      Because you are going to be remelting it, you can use it right away. If you choose to use the recipe as a regular soap recipe without remelting, then you need to wait 3-5 weeks for it to harden.

  • Nina
    · Reply

    September 2, 2024 at 5:37 PM

    5 stars
    Hi my name is Nina I want thank you for a wonderful job. I have a family of 5 and 3children and myself are allergic to a lot of stuff so I make some of our stuff your recipes are wonderfully thank you

    • Kelly
      · Reply

      Author
      September 2, 2024 at 9:11 PM

      I’m so glad I could be here to help!

  • J
    · Reply

    November 16, 2024 at 8:48 PM

    5 stars
    Your recipe looks great, but I haven’t made it yet so I can’t comment on the finished product yet. I am wondering however, if this soap should be wrapped to keep it from developing glycerin dew?

    • Kelly
      · Reply

      Author
      November 16, 2024 at 9:02 PM

      It does have high glycerin, but no I haven’t had to wrap it. It doesn’t weep.

  • Valerie
    · Reply

    December 10, 2024 at 10:27 AM

    I’m looking forward to making this! Can I substitute goat’s milk for the water for the Melt & Pour Soap Base? Thank you!

    • Kelly
      · Reply

      Author
      December 10, 2024 at 6:52 PM

      Yes you can.

  • Stephanie
    · Reply

    January 19, 2025 at 10:07 PM

    Hi Kelly, I have to say you’re a great inspiration! I really like the Goats Milk melt and pour, Can I use powdered Goats Milk and when would you recommend adding it?
    Thank you so much!!

    • Kelly
      · Reply

      Author
      January 20, 2025 at 4:16 PM

      You can definitely use powdered goat’s milk It will not add more moisture, so that’s a plus. I would add it when you add the color or essential oils after it’s fully melted.

  • Anna
    · Reply

    February 14, 2025 at 6:11 PM

    Does using a different kind of oil make a big difference? For instance, if I used only tallow instead of the oils you recommend will it hinder the recipe? Thanks so much for your great recipe!

    • Kelly
      · Reply

      Author
      February 16, 2025 at 11:13 PM

      Yes, it makes a HUGE difference. Each oil brings something different to the soap. Some bring bubbles, some are cleansing, while others are not. You can make a tallow soap. They are a good sturdy soap, but I would increase the superfat content (less lye) for more moisture in the bar. You’d need to use a lye calculator to get the exact amount needed.

  • Heidi Kostyak
    · Reply

    April 4, 2025 at 2:52 PM

    Hi Kelly,

    I read your book and I have a few questions. I am new to the whole soap making world. I have few questions if you don’t mind. Is there a certain brand or size of olive oil, coconut oil, sweet almond oil, apricot kernel oil, avocado oil, and Castor oil that I should use. Also is there a certain Shea butter or glycerin that I should use as well and where is the best place to get everything from.

    Thank you,
    Heidi from Pennsylvania

    • Kelly
      · Reply

      Author
      April 6, 2025 at 10:45 PM

      Hi Heidi!
      I’m glad you found me. I like to get a lot of items from starwest botanicals, bulk apothecary. You still need to be careful at bulk apothecary. Make sure to check ingredients and try to get pure items with zero additions and minimal processing.

  • Laia
    · Reply

    June 9, 2025 at 1:56 PM

    I am wondering if this is a recipe needing to have other forms of shampooing and such? It is lye which is why I ask. From my research you need to have vinegar washes etc if you’re using a lye bar soap because the pH ends up being incorrect and can cause your hair to be damaged especially with long term use. Thanks!

    • Kelly
      · Reply

      Author
      June 9, 2025 at 2:07 PM

      That’s a great question. Shampoo bars are actually around 5.5pH which is slightly basic, which is an acceptable range. They don’t do damage to hair. What happens is that they don’t have some of the chemicals that are in commercial brands that help drop minerals from the hair shaft. This is only a problem if you have hard water. Those with soft water don’t have to do anything. Those with hard water can use a conditioner such as a vinegar rinse, but it needs to be diluted by 50% so that you are closing the shaft and not creating an acidic environment for your hair. I hope that helps clear up some rumors.

  • Fakhira
    · Reply

    September 18, 2025 at 6:10 AM

    5 stars
    I can’t thank you enough for your generosity in sharing your recipes!
    I’ve just ordered your book and am looking forward to learning more from you.
    What percentage additives do you recommend for say 500gms of Melt & Pour?
    Blessings, and may your business continue to prosper and flourish ☺️

    • Kelly
      · Reply

      Author
      September 23, 2025 at 8:10 AM

      I would only add about 15 grams or 1 tablespoon to that amount of soap.

  • Brittany P.
    · Reply

    October 27, 2025 at 11:14 AM

    5 stars
    Good morning! I am so excited to try this recipe out!
    How do you calculate how much Glycerin to put into the recipe? I use only 4 ingredients and I am very interested in making this for my clients.
    Thank you for your insight! I appreciate your time!

    Brittany P.

    • Kelly
      · Reply

      Author
      October 27, 2025 at 3:53 PM

      I use about 2.5 ounces per pound of soap I’m making. Hope it works well for you!

      • Brittany P.
        · Reply

        October 31, 2025 at 4:33 PM

        I tested out the recipe with the amount of glycerin you mentioned, but when I went to melt it down, I couldn’t achieve a smooth consistency. What do you recommend? More Castor Oil?
        The base I used was Olive Oil, Coconut Oil, Shea Butter, and Castor Oil, then the glycerin.

    • Kelly
      · Reply

      Author
      October 31, 2025 at 4:45 PM

      It may not be the ingredients. It may be the temperature and moisture levels. I’d add more water and cover with plastic wrap as melting, then make sure the temp gets hot enough. It should get to a smooth consistency that’s similar to thick pancake batter, not the thin consistency of melt and pour with harsh chemicals.

Leave a Reply

We'd love to hear your thoughts and ideas!
Cancel Reply

Recipe Rating


Join the Simple Life Mom Community

And get a FREE Bath and Body Recipe E-Book:

Thank you!

Check your email and add me to your address list so messages don't go to spam. 

You'll have a link to the free e-book in the email.

Kelly

SHOP

Join Us and Get New DIYs and Recipes Subscribe

Categories

  • Soap Making
  • Bath and Beauty
  • Health and Essential Oils
  • Home and Garden
  • Homestead Blog Hop
  • Real Food Recipes

Books

  • Natural Soap Making Book for Beginners
  • Easy Soap Making
  • Natural Soap Making How-To and Recipe Book
  • Make it Yourself: Bath & Home DIY for Self Sustainability
  • Natural Beauty from Head to Toe
  • Herbs & Essential Oils in Soap Making

SHOP

Other Resources

  • Mountain Rose Herbs
  • Herbal Academy
  • Amazon
  • Revelation Health

© 2026 Simple Life Mom - All Rights Reserved

  • Disclaimers/Policies for Simple Life Mom

Press Enter to search · Esc to close