We’ve already discussed the Benefits of Henna, as well as all kinds of Natural Herbal Hair Dye Ideas. Now that you understand the benefits and many options available to you, it’s time to tell you How to Dye Hair Naturally Step by Step.

As I said in Go Organic: 9 Natural Herbal Hair Dye Ideas, you can dye your hair permanently or just bring out natural highlights and enrich your hair color with herbs. Here are your different “Henna” options again. Even though some are called henna by tradition, they may have little henna (remember, henna is red). Some brands have a few bad ingredients too, so make sure read the label. I trust these from Starwest Botanicals:
- Red Henna (Find Here): Pure Red Henna Powder
- Blonde Henna (Find Here): Neutral Henna Powder, Chamomile Flower Powder, Red Henna Powder, Goldenseal Root Powder
- Brown Henna (Find Here): Red Henna Powder, Indigo Powder, and Coffee Powder
- Black Henna (Find Here): No henna, it’s actually Indigo powder (commonly called black henna in hair dye circles)
- Mahogany Henna (Find Here): a combination of Red Henna Powder and Indigo Powder
How to Dye Hair Naturally: Some Questions Answered
Will natural hair dyes cover grey?
Yes. Henna and Indigo are great for covering grey. Blonde has the least amount of henna and has no indigo so it won’t cover as well as the other colors. It will enrich and give some coverage from what I’m told. That is one combination I have not tried myself so I look forward to some of you letting us know how that does.
Will natural hair dye lighten my hair?
No. Natural hair dyes will darken your hair or give a richer color to drab or dull hair. It will not lighten hair. Use lemon juice and the sun for that.
Will natural hair dye cover my roots that are growing out from my last hair dye experience?
Yes and No. If there is a stark difference (you dyed your hair blonde and dark roots are growing out), then you will probably still see the stripe. If it’s a small difference, you will probably cover it up if you are using a blend with a lot of henna or indigo.
Will natural hair dye give me a uniform color?
If you have natural or previously dyed highlights, chances are you will still subtly see those highlights. When I dye my hair during the winter it looks very uniform because my highlights from the sun have faded. During the summer when my highlights are strong, my henna hair has very pretty highlights throughout. I love it.
How to Dye Hair Naturally: Step by Step
NOTE: I will outline how to use henna first. Then I will explain any changes you need to make if you are using a mixture with other herbs.
NOTE AGAIN: Some people are allergic to indigo and other herbs. Test all natural hair dyes on a spot near your scalp under your hair and wait an hour or so to check for an allergic reaction before applying to your entire head.
Supplies:
- 1 glass bowl
- 1 wooden spoon
- 8oz henna (more or less depending on the amount of hair you have)
- apple cider vinegar (you can also use additional liquids mentioned below)
- gloves (a MUST)
- shower cap or plastic wrap
- old towel and/or t-shirt
- a thick lotion (or a natural non-petroleum Vaseline)
- Hair clips or ties (not necessary, but helps to make sure you don’t miss anything)
- A good, natural hair conditioner
Step One: When to Start
Before you jump in, know that henna needs some time after the liquid is added to activate. See step four below and plan accordingly.
THEN, once you put it on your head you will need more time to let it sit before washing it out. I usually mix the henna the night before, apply it in the morning, wait four hours, then wash it out.
Step Two: How Much to Use
Your natural hair dye will come as a powder in a bag or other container. The amount that you will need to use depends on how much hair you have. For shoulder length to below the shoulder, use 1 cup (8oz). If your hair is considered short, use 1/2 cup (4oz). For waist length hair you’ll need 2 to 3 cups (16-24oz).
Step Three: Adding the Liquid
From my experience, using an acidic liquid helps activate the henna and ensures a stronger coverage. It’s a must if you have any white or grey that you want to cover.
Use liquids like:
- Apple Cider Vinegar
- Lemon Juice
- Grapefruit Juice
You can always combine the above liquid with yogurt, water, egg yolk, or oil for your total liquid amount.
So, what consistency?
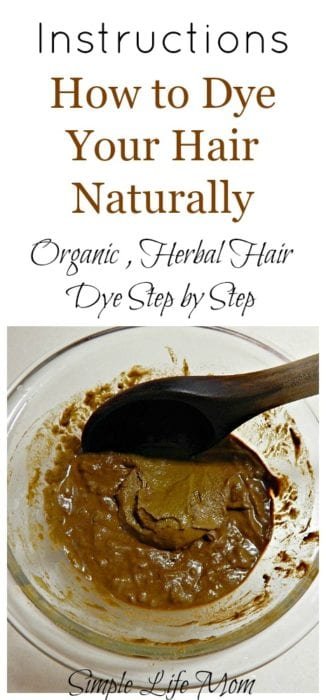
It’s better to have your henna mixture too thick than too thin, since it will be easier for you to scoop it up with your gloved hands and spread into your hair. If it’s too thin, then it will run everywhere and you’ll have a big mess (like I did the first time I used henna). I like it to be about the consistency of hummus or yogurt. Every henna is different so just add the liquid slowly and stir until you think it’s right.
Step Four: Letting it Activate
As mentioned above, henna will need time to release its dyes. This differs based on the temperature of your home.
- During winter days, if your house is in the 60s (or below), cover the wet henna with plastic wrap and let it sit for 12 to 24 hours. Don’t let it sit for more than 48 hours or it will begin to break down and lose some of its potency.
- During summer months and your home is warmer (upper 70s or higher), let the wet henna mixture sit for 4-12 hours. Don’t let it sit for more than 24 hours.
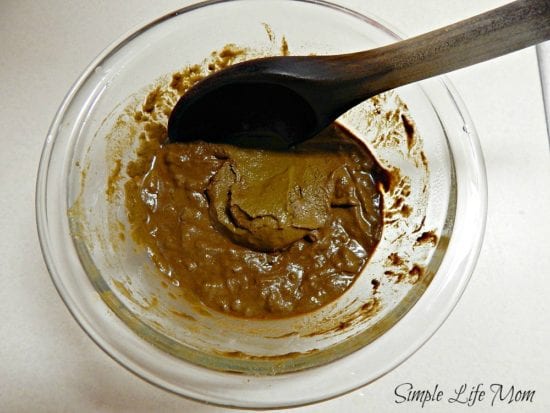
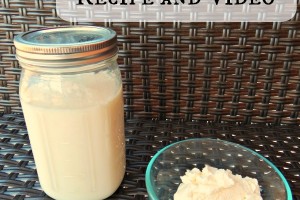
The top will oxidize with the air whether covered or not and have a browner top layer. You can see this is the picture.
Step Five: Getting Ready
Henna and Indigo both adhere better when your hair is wet. It also seems to glide on and cover easier. You can start dry, but I always feel like a tangled mess when I’m finished applying over dry hair.
You will have people tell you that henna is very conditioning, and have others say it is very drying. It can be both. If you tend to have very dry hair you can always rub some avocado or coconut oil into your hands and lightly spread into your hair before applying. Don’t use jojoba as it is a wax and tends to coat and not soak in as well. You don’t want to create a barrier from the natural hair dye.
- Put on an old t-shirt that you can wear for hours around the house.
- DO THIS IN THE BATHTUB your first time! I still drop a few specks here and there, but the first time I did it I got henna everywhere! Thankfully it was in the tub. Wash it down as soon as you’re done so it doesn’t stain your tub.
- Get a shower cap or plastic wrap ready beside the tub. I use plastic wrap and take it out of the box. It’s much easier to wrap around your head without the box.
- Clip your hair up and place a thick lotion (I use my shea lotion) all around your hair line on your ears (Don’t forget your ears or they will be dyed too!)
- Get your bowl of henna and put your gloves on.
Step 6: Putting it on
Clip your hair up, leaving one portion at a time to work with.
Scoop some henna into your gloved hand and start at your roots, giving your hair a nice and thick coating. Repeat all around your head until your hair is completely covered.
Wrap your hair around your head like a turban. It’s got a thick goop on it to help it stick. You’ll see what I mean. Apply your shower cap or begin wrapping your head in plastic wrap by going around a number of times, tearing it off and patting it down (you may need to get your ears out after you finish wrapping).
Wipe off all the drips on your ears and neck and place a towel around your neck. The reason you need the towel is because the heat coming off of your head will eventually cause some dripping.
WAIT 4 hours! You’ll see everything on the internet concerning how long to wait. Some people will tell you they leave it on overnight. I have no idea how they do this because your hot head makes it drip and you’d have a mess everywhere! Others will tell you 30 minutes (though that’s super rare). What I have found is that anything over 4 hours is very unnecessary. Shortening it to 2 hours or less could possibly not give you as much color.
Step 7: Rinsing it out
You must wash your hair out thoroughly! Don’t be afraid of losing color. Get in the shower and either get on your hands and knees and rinse it out or stand and tilt backward and rinse until the water starts to run clear. Then apply a conditioner, massage your scalp and rinse again. You may need to do this two or three times. If you don’t rinse well enough your scalp may get itchy.
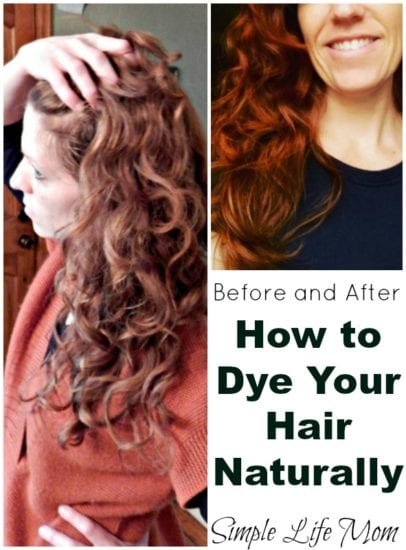
What to Expect for the first 24 hours: Your hair will be a lot brighter for the first 24 hours and then will relax to a mare natural color. I kind of wish it would stay punk rocker red, but as a 15 year old girl once told me, I’m an adult so It’s good that it mellows out, Lol!
How to Dye Hair Naturally
Ingredients
- 8 oz henna powder combination of your choice
- apple cider vinegar enough to make a hummus like or yogurt like consistency
Instructions
- In a glass bowl, use a wooden spoon to combine henna powder with enough apple cider vinegar to make a hummus or yogurt like consistency.
- Cover and let sit 12 -24 hours if your home is in the 60s or below. If it is hotter let it sit for 4-12 hours.
- Put on an old t-shirt and gather gloves, shower cap, and old towel.
- Wet your hair (optional)
- Place shea lotion around your face and on your ears.
- Clip hair up, leaving one section down at a time and apply henna with your gloved hands, starting at your roots.
- When hair is covered, wrap hair close to head and apply shower cap and put the towel around your shoulders. Wipe off drips on your ears and neck.
- Leave on your head for 2 hours.
- Wash thoroughly with a conditioner. You may need to wash multiple times.
Differences When Applying Other Natural Hair Dyes
The above instructions are specifically for henna or a hair dye consisting mostly of henna. Here are a few key differences when using other mixtures.
- Indigo does not take long to activate. If you’re using just an indigo, it’s better to use water and apply immediately after mixing.
- Obviously henna takes a lot longer to activate than indigo, so what do you do with a blend? Use hot water. Place plastic wrap directly on the paste so it is airtight. Only wait 1 hour and apply. You can also buy henna and indigo separately and mix them really well when henna is ready.
- For a super black color, dye hair first with pure henna, then dye with pure indigo.
- Many people say that for indigo you should only rinse well with water and not use shampoo. You want to leave a slight residue that will continue to oxidize over the next 2-3 days. Then wash well.
- Where henna is bright at first and then mellows after 24 hours, indigo does the opposite. Indigo color really enriches after 24 -48 hours when it has had a chance to truly oxidize.
- I have read the bleaching hair that has been dyed with indigo or henna may have odd results (like greens).
That’s it!
It sounds really complicated, but really it’s just mixing the henna with a liquid, letting it sit, making sure you don’t dye your whole body or the house, and then slapping it on. Don’t get stressed about it all, just have fun!
If you have more questions, please ask!




18 Comments
Leave your reply.