

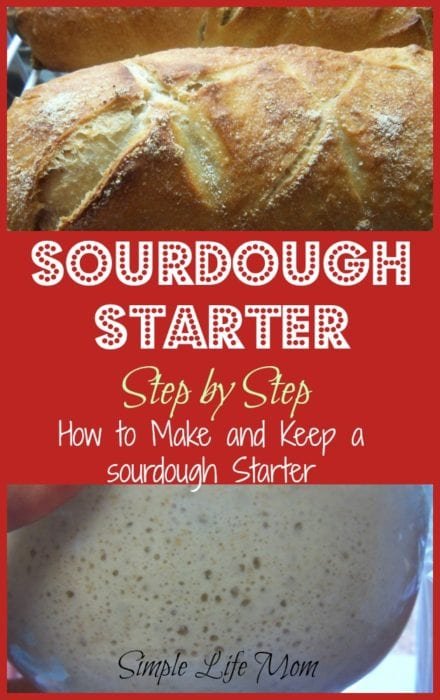
A sourdough starter is something that families have kept in their homes for hundreds of years until recently.
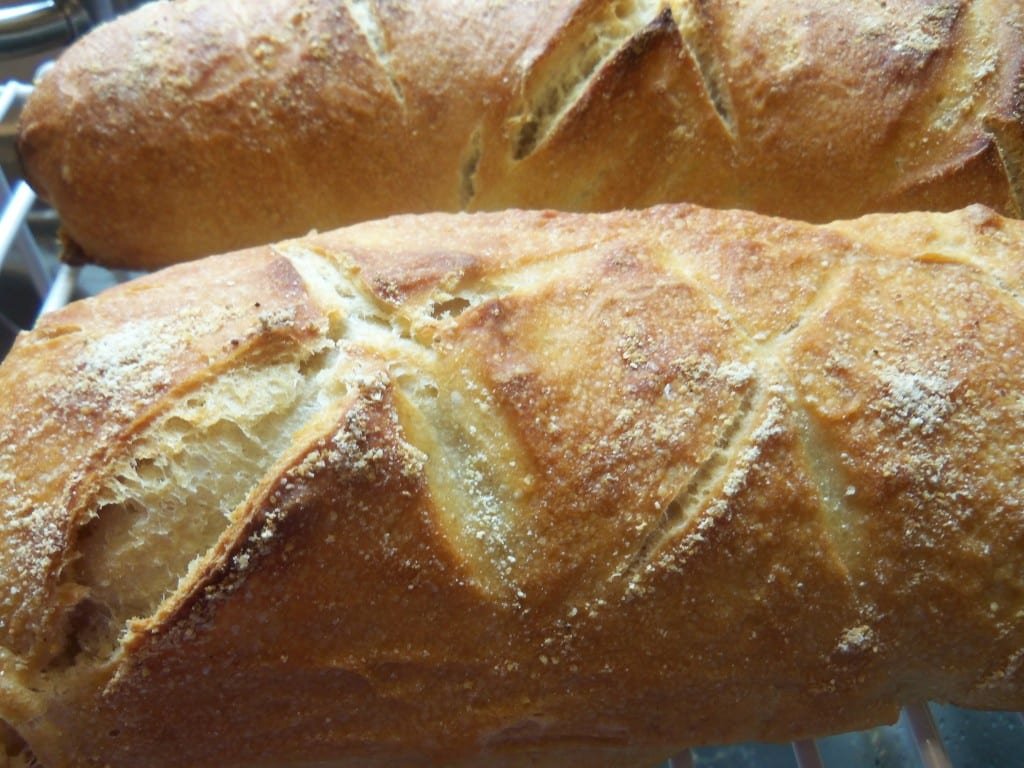
Sourdough bread is a bread that is made from yeasts that are found in the air (wild yeast), instead of adding active dry yeast or baker’s yeast to make bread. It is a method that has been used for a long time and creates a wonderful bread with only a hint of sourness (depending on how long it ferments). In fact, it’s been found that many people with gluten sensitivities have less problems with true sourdough bread.
True sourdough bread is made with a full sourdough starter. These days, many companies will call something sourdough when they’ve added a sourdough element, but they will still add a yeast and non-fermented dough. If you are eating sourdough bread in hopes that it will sit better on your stomach than other gluten breads, then keep this in mind.
Sourdough tastes amazing and has many great benefits.
Benefits:
- If you learn how to bake bread this way, you can always make bread as long as you have flour and water. A little more self-reliance.
- Starters can last a life time once they are established and cared for.
- As long as you learn the method and have patience to walk away and let it set (which I had a hard time with at first), there is very little work to do at all.
- The long fermentation process allows time for the protein (gluten) to be broken down into amino acids. This makes the bread much easier on the digestive system (whether you are gluten sensitive or not).
- And, if we’re going to get technical, the fermentation process activates phytase which dissolves phytates (just as if the seed was getting ready to germinate), thus freeing up minerals like phosphorous, zinc, calcium, magnesium, iron and copper for your digestion.
So, there’s some amazing benefits. What about the difficulty of making it?
When I first tried to make a sourdough starter, I didn’t really follow instructions, and I made a lot of mistakes. I ended up with great tasting bread that was so dense I was worried about people breaking their teeth (Yet they still ate it).
At one point, I also had a starter that smelled strongly of ammonia.
Since then, I have learned the how’s and why’s and it has really become a habit that I don’t really think about how to do any more.
I now want to pass along this information and hopefully answer any questions you may have so that you can make this incredibly healthy bread at home too.
The Details
Step One: Make Your Starter
1. Slice a potato into quarters and boil it for 15 minutes in 4 cups of water. Eat the potato (or whatever you want to do with it) and reserve the water. You can skip this part if you like, but I think the added starch and vitamins from the potato water does the starter good.
2. Once the water has cooled a bit, use 3 cups of it to make the sourdough starter. Using a wooden spoon (metals can hurt the yeast), stir in the 2 tablespoons of honey and the 3 cups of flour.
Some water will have evaporated during the boiling. Ideally, you want equal amount in weight of flour and water. A good rule of thumb is to add 1/2 to 2/3 cup water to every 1 cup of flour (flour is lighter so you will add more).
Your final product should be very sticky dough. Not sticky enough that it looks like pancake batter, but not as thick as if you were baking a regular loaf of bread.
3. Whip some air into it by stirring vigorously for a minute or two.
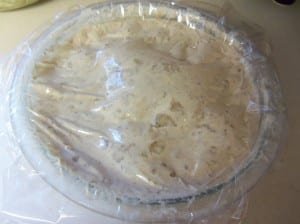
Step Two: Let Your Starter Ferment
You want air to get to the dough, but you don’t want it to dry out.
Options:
- Cover your bowl with a lid, but leave the lid cracked open.
- OR cover with plastic wrap and then poke holes in it.
- OR place a clean dish towel or basket over the lid.
Leave the starter on your counter top for 2-3 days, feeding every 12 to 24 hours.
The more frequently you feed it, the faster it will ferment. But you are putting it on a schedule, so you need to try to stick with whatever you choose. So, on a 12-hour schedule you may make this at 10am. Before you go to bed that night, feed it, mixing well, and loosely cover it again.
Feed with:
- 1/2 cup flour
- 1/4 cup water
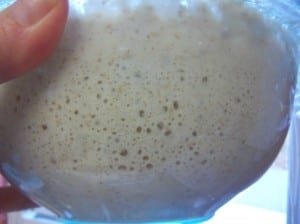
Repeat every 12 or 24 hours (depending on the schedule you chose at the beginning) until you see it really rising and bubbling inside and on top. Remember, the point is to get enough yeast from the air permeated throughout the dough so that you have a fluffy dough. Too little feeding and the yeast will run out of gluten to digest, and an ammonia smell will begin to develop.
If you miss a feeding and the ammonia smell is slight, just feed it and keep going. If it’s too strong, you have to start over. Your bread will smell like ammonia.
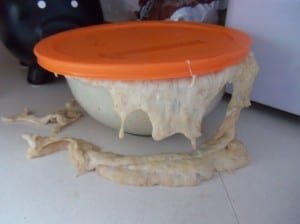
Make sure it has enough space to grow!
This is your starter.
After 2-3 days it will be full of natural and healthy yeast. You will keep this in your refrigerator, taking a portion out when you want to make a loaf of bread. You will feed it once a week to keep it healthy. You can do this if you make bread once a week, otherwise mark it on your calendar to make sure it’s fed once a week and stays healthy so that you can still make bread with it whenever you’re ready.
Sample Schedule:
I make my starter at 6pm Sunday night. I feed it at 7am or so when I get up Monday morning. I feed it again at 6-7pm Monday night, and again Tuesday 6-7am and Tuesday night 6pm. Now it is bubbly and ready to go in the fridge.
I will feed the starter in the fridge at least once a week (or when I make bread once a week).
I want to make bread now, so I will feed the starter Wednesday morning and then let it set for 6-8 hours on the countertop lightly covered. You will learn the optimal rise. This will vary depending on the temperature of your house. You don’t want it to rise too much and fall, because then the yeast has begun to run out of food. You want to get it when it is super active and well fed. After waiting the 6-8 hours, I will remove what I need for my recipe, feed the starter one more time and put it in the fridge.
If I am not going to make bread right away, I will feed the starter Wednesday morning and put it straight into the fridge for a week and not let it sit out for the 6-8 hours.
I’ve taken the starter out and fed it, removed what I need for my recipe and returned my starter to the fridge late at night, gotten up in the morning and had a great dough ready to make into a loaf the next morning. This is in winter though. It can raise a lot faster in hot summer months, depending on the temperature of your house.
Step Three: Regular Feeding (remember to use a wooden spoon and glass dish)
Some people have kept their starter fed for 30 years (so I’m told). I’ve had mine for a year, so I guess I can see that happening. The thing is not to neglect it. It only takes a few moments a week to maintain it, so mark it on your calendars so you don’t forget.
Baking Throughout the Week
If you want to make sourdough bread a few times a week, then:
- remove it from the refrigerator and wait 1 hour for it to warm up a bit
- feed the starter to activate it and wait 6-8 hours
- Remove what you need for your bread recipe.
- Feed the starter and return it to the fridge.
Baking Once a Week
Follow steps for baking throughout the week.
Baking Less Than Once a Week
If you do not make sourdough in a week, remove your starter from the fridge, discard all but 1/2 cup, feed it, let it set for a few hours at room temperature, then return it to the fridge.
Sourdough Starter Recipe
You can buy your own starter on great sites like culturesforhealth.com, but it’s really unnecessary. I have found this to be the best method when making my own starter:

Sourdough Starter Recipe
Equipment
- 1 stirring spoon , preferably wooden
- 1 cheese cloth , or other cloth
Ingredients
- 3 cups filtered water
- 1 potato , quartered
- 2 cups unbleached all purpose flour , or flour of your choice
- 2 tablespoons honey
Feeding
- ½ cup unbleached all purpose flour
- ¼ cup filtered water
Instructions
- Pour 3-4 cups of water into a saucepan and then add a potato and bring the water to a boil. Cook for 15 minutes.3 cups filtered water, 1 potato
- Cool the potato water until it is lukewarm and then transfer 2 cups of water to a glass bowl. Add the honey and flour, stirring until a wet dough is formed.2 cups unbleached all purpose flour, 2 tablespoons honey
- Cover with a cloth and let it sit on the countertop at room temperature for 2-3 days, feeding with 1/2 cup of flour and 1/4 cup of water every 12 hours.1/2 cup unbleached all purpose flour, 1/4 cup filtered water
For Sourdough Recipes, click here: Sourdough Recipes
The above link will give you the recipe that uses your starter to make AMAZING rustic sourdough bread.
Enjoy!


43 Comments
Leave your reply.